Easter Bunny Egg Cosy Tutorial

Another one of these crafts that we all do as kids and seem to forget about… Cute egg cosies! Ok personally I think egg cosies are completely pointless other than for decoration in this day and age XD The point is to keep your soft boiled eggs warm until you are ready to eat them but I have never once sat down to eggs and thought “Damn! My egg is so luke warm, if only I had someway to keep it warm… other than eating it straight away”. Of course it could be that if I lived in a colder climate I would think these are the best thing ever invented XD

Either way, they are insanely cute and are actually useful if you plan on taking  hardboiled egg in a lunch box as they add some padding to prevent cracks. I’m planning some patterns for knitted versions as well but in the mean time here is the way I’m pretty sure everyone made them as a child: felt!

Egg Cosy Tutorial8392249430348552813

What you need:

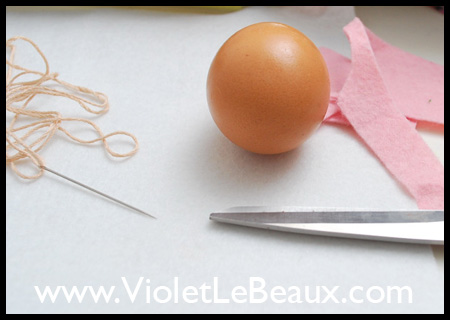
  • Felt in various colours, as I’m making a bunny I went with white and pink for the nose
  • Needle and thread
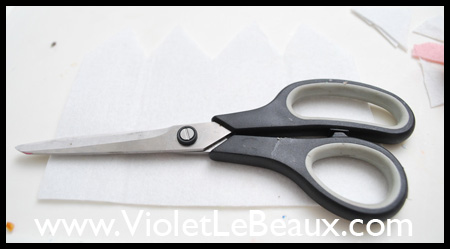
  • Scissors
  • Small piece of elastic.
  • Egg (for measuring)

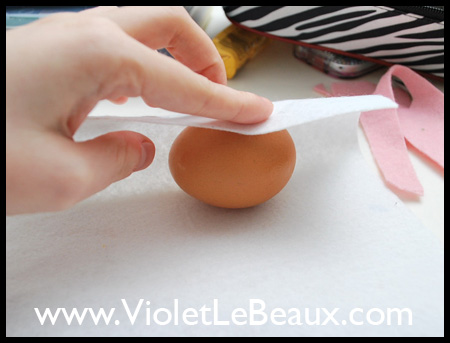
Egg Cosy Tutorial6882752192969695480First thing is to measure around your egg to see how much felt you will need. Make sure to leave enough room so that it is easy to slide on and off the egg and still has room for the seam down the back. Also measure how tall you want it, It will need to be tall enough to cover the egg completely as leave room for the gathering at the bottom as well as the ears up the top.Egg Cosy Tutorial6792085191610809262

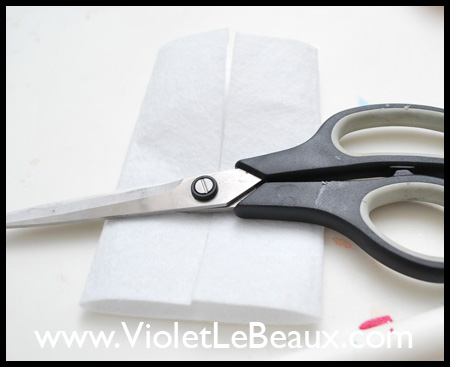
Once you’ve measured and cut the felt into the correct size rectangle, fold the sides inwards to the middle like so:

Egg Cosy Tutorial7305133852692861281

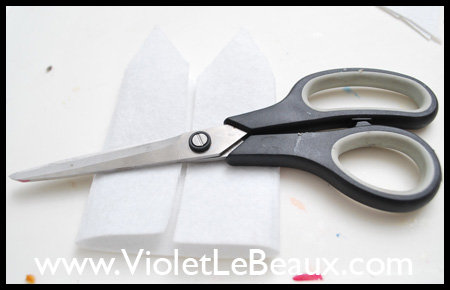
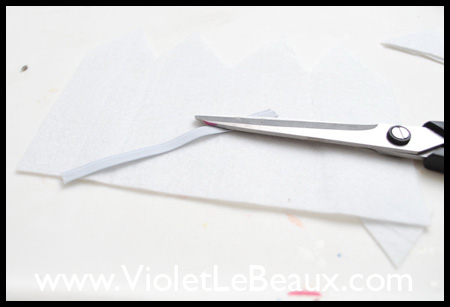
It’s a bit hard to see in this photo because of the colour of the back ground but the next step is to cut the shape of ears into the top. I started with 2 points and later cut them to be more rounded.

Egg Cosy Tutorial1242899490850280334

Once you unfold, you should have 4 ears up top.

Egg Cosy Tutorial2720868109171109523

Now cut a piece of elastic which can stretch easily to fit around the widest point of the egg…

Egg Cosy Tutorial208413047103048739

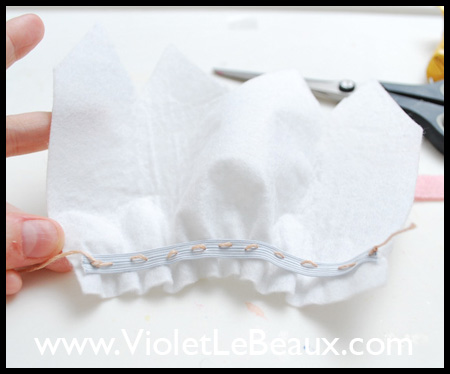
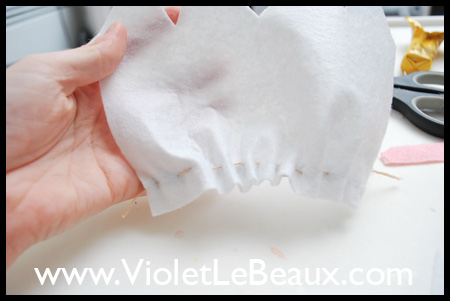
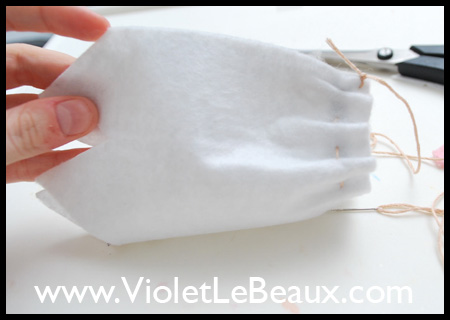
And stitch it to the bottom of the felt, leaving a small gap at the bottom for a frill. Make sure that the elastic is stretched out when you sew it and stitch loosely so you don’t restrict it otherwise you’ll find it hard to get the egg in!

Egg Cosy Tutorial2925180223029891282

From the front it looks like this….

Egg Cosy Tutorial8028374943633534137

Now fold it all in half with the seam at one side…

Egg Cosy Tutorial6584468593893108451

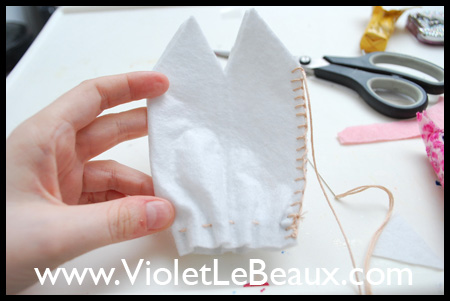
… and stitch up using a blanket stitch.

Egg Cosy Tutorial415688048742598698

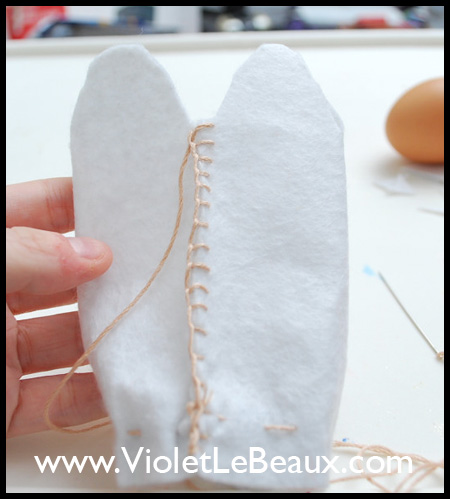
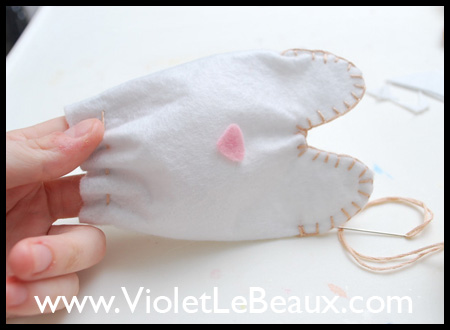
Once you flatten it out it should look something like the picture below. This was the point that I decided to round out my ears a bit.

Egg Cosy Tutorial3441044786796237653

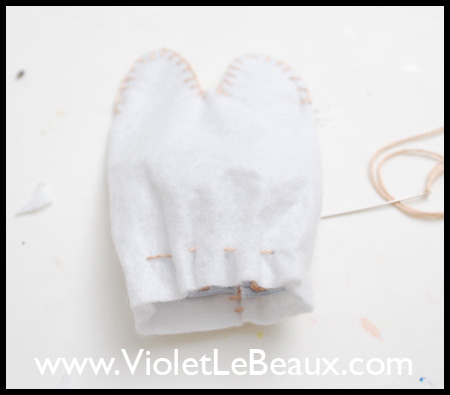
The next step is to stitch around the tops of the ears in the same blanket stitch.

Egg Cosy Tutorial2729976096388673345

After that’s done it’s just a matter of cutting out a little nose…

Egg Cosy Tutorial2195453554968121697

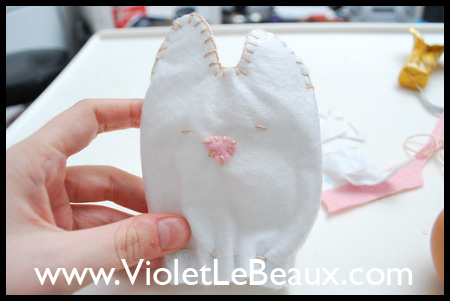
And stitching on it’s face!

Egg Cosy Tutorial1626949845217059281

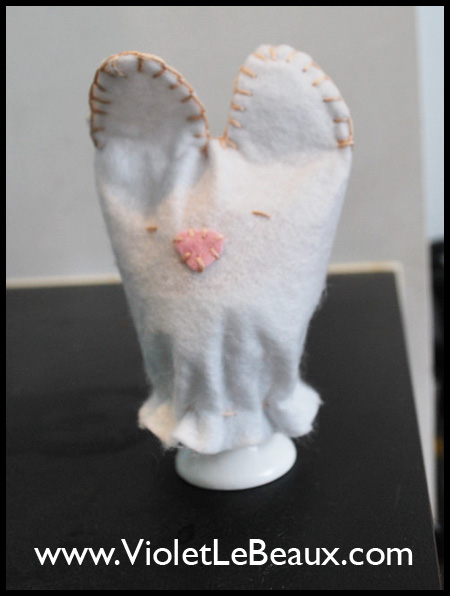
Pop and egg in and he’s finished! Ready to keep your egg toasty warm or safe in your lunch box.

Egg Cosy Tutorial750377520650472723

The pattern itself is very easy to change into any shape you like because really it’s just a rectangle of felt XD These kinds of projects also make nice customisable quick presents for people that have everything especially because you can personalise it so much. Try stitching on their name of using their favorite animal ^_^

How To Style a Hime Gyaru Wig

As carrying on from yesterdays post on Fashion Addict here is how I styled the blonde one into a hime gyaru wig 😀

The technique I’m using is pretty much the exact same technique for standard hime style hair but because it’s a wig there’s no fear of damage so you can pretty much go nuts. Or if you are happy to brush out lots of tangles this is a perfectly fine way to style your actual hair.

VioletLeBeauxDSC_0189_755

As per usual with these I point out that this is just the way I do it and there are lots of other techniques or methods that you could use. I’m certainly not an expert!

So this is the wig to start with, it’s just a plain old multi-tone blonde wig. The cut is layered and it has a light wave to it. As you can see it has very little volume.

VioletLeBeauxDSC_0132_698

The way the top of the hair is parted is also important, this one has a zigzag pattern. It would be better if it was a straight part of even no part so it’s less obvious when you brush it all backwards.VioletLeBeauxDSC_0136_702So what we want to do is create a lot of volume at the top and sides to make the big lion’s mane effect. The first step is to grab a section in the middle/top and pull it up. I am using a teasing comb to do this, it’s awesome because it has alternating long and short bristles so it catches all of the short hairs and teases perfectly… which it should being a teasing comb and all.

Back to it, grab a section at the top towards the back of your head. Leave around 2cm of hair between the section you’re taking and where you want the fringe/bangs to start. At the moment we just want to create a lot of volume before we use the front to cover it all up.

VioletLeBeauxDSC_0138_704

Pull forward and tease the back of the section around 3-4 inches from the root. By teasing/backcombing what I’m doing here is combing from the middle back down to the roots. The teasing brush catches all of the shorter hairs and meshes them together into a tangle which gives the piece of hair volume and texture.

VioletLeBeauxDSC_0140_706

Once you’ve teased it a reasonable amount it should have volume all on it’s own, you will of course look like an extra out of a Dr Seuss book at this point.

VioletLeBeauxDSC_0144_710

So that’s the volume part but the front looks terrible so to fix that we need to smooth down the front. Take your comb and using light short strokes brush lightly back over the front section. You may need to hold the wig in place while you do this. Don’t let the bristles of the comb sink into the hair too deeply or you will basically be undo-ing all of the teasing you just did.

VioletLeBeauxDSC_0147_713

Once you have smoothed the front over it should look something like this from the side…

VioletLeBeauxDSC_0149_715

That’s really all there is too it, just a lot of teasing, smoothing and eventually hair spraying. This wig is perfect for styling like this because it has lots of short layers. Clip the section you just styled out of the way, we will come back to it later.

The next step is to give the wig more volume all over so it start to get into the right basic shape: lion’s mane XD

Starting with small sections from the sides, hold the piece of hair out at a 90 degree angle and tease the 3 inches closest to the root.

VioletLeBeauxDSC_0151_717

Repeat this until you’ve done every piece of hair on each side. Don’t touch the front area between the first section we did or the fringe.

VioletLeBeauxDSC_0152_718

Now keep going to the back. Pull the sections upwards and tease at the roots. You can see in this photo the individual tracks of hair and my pink tips showing through XD

VioletLeBeauxDSC_0157_723

Don’t forget to do the underneath sections too, they are very important because they hold the rest of the style up!

VioletLeBeauxDSC_0160_726

Below you can see how much volume is created just by teasing at the roots. Because this wig is more wavy than actually curly I decided to play up the curls by teasing them at the ends slightly too. To do this, you grab the end of a curl by the tip and run the comb from the tip up a couple of inches. Only do this once per curl otherwise you disturb them rather than accentuating them. Basically you’re pushing the curl up the strand of hair so it looks… curlier.

VioletLeBeauxDSC_0161_727

Now it’s time to finish the top section finally! Unclip it and we’ll get to work 😀

VioletLeBeauxDSC_0164_730

At this point it should look something like this…

VioletLeBeauxDSC_0168_734

The final step involves the sections between the top and fringe that we’ve been saving. Taking a small piece of hair from that area at a time, tease the back of it lightly and then sweep it backwards.

VioletLeBeauxDSC_0171_737

At this point hairspray will be your friend. I’m taking a lot of spray. You can see below I’ve started sweeping the front back on the left side but not the right yet.So it’s starting to come together.

VioletLeBeauxDSC_0175_741

Because you are trying to brush pieces of the wig in directions they weren’t designed to go in, doing this will take some trial and error. Getting mine to stay took a whole lot of hairspray and then a lot of teasing and smoothing over the front…. tease, smooth, spray, tease, smooth,spray over and over.

This is starting to look more like the finished product now but not there yet.

VioletLeBeauxDSC_0166_732

Half finished from the back it looks very messy so this area needs to be combed and sprayed as well.

VioletLeBeauxDSC_0169_735

After continuing with the combing and spraying, paying careful attentions to the sides as well as the top this was my finished product:

VioletLeBeauxDSC_0177_743

From the side:

VioletLeBeauxDSC_0184_750

Now looking at the photos I can see areas I intend to improve, for example cutting more layers into the back and using that to creating more defined curls.

You can see below  that it definitely needs a few more layers to make the top pouf look more natural with the loose hair below. Until I do that (or if you don’t trust yourself cutting into a wig) this can be temporarily hidden with a big bow.

From the back:

VioletLeBeauxDSC_0182_748

With the addition of some accessories I’m quite happy with the way it turned out considering it was a first attempt. When I make the changes I’m planning I will be sure to post photos of that too 🙂

VioletLeBeauxDSC_0189_755

Bonus photo: Taking off the wig and scaring the hell out of James with by real hair because he was so used to the wig XD

VioletLeBeauxDSC_0199_765

The wig by itself from the front:

VioletLeBeauxDSC_0204_770

The back:

VioletLeBeauxDSC_0202_768

Side:

VioletLeBeauxDSC_0203_769

So there you go, that was my first adventure into wig styling and I’m quite happy with the outcome. Of course there are a lot of areas that I need to improve in and this isn’t the best example of a hime style wig but I can see where I want to go from here  and that’s all for another post! I think to style the back and sides I will make James wear it so I can see what I’m doing better hahaha!

VioletLeBeauxDSC_0186_752

Hope you enjoyed my bout of Hime Gyaru wig styling ^_^

How To Make A Hello Kitty Velcro Hair Holder

Here is another super quick craft which can be done during an episode of something on tv 😀 These haven’t quite made it to Aus yet but when traveling I’ve seen how popular they are in Asia. Basically it’s a shape (usually a bow or something equally cute) with velcro on the back to hold your fringe out of the way while you do your make up/remove it. I think the idea is that it doesn’t kink/shape the hair like holding with a pin would.

I chose to make mine in the shape of Hello Kitty’s bow because… well I couldn’t think of any other shapes and I’m running out of other felt colours haha!

Velcro Bow Tutorial

Photos are iphone quality unfortunately because this was a midnight craft idea!

.

What you need:

  • Felt
  • Needle and thread
  • Velcro strips

Velcro Bow Tutorial

First cut out the main shape of the bow in black felt. I didn’t have any large pieces yet so I did it in sections and stitched them together. It’s a fairly easy shape but if anyone wants it let me know and I’ll put up a pattern.

Velcro Bow Tutorial

Separate the two sides of your velcro. The side you want to use it the scratchy one not the soft one. The soft one won’t grab on to your hair.

Velcro Bow Tutorial

Cut enough so you can cover as much of the bow as possible, I needed two strips.

Velcro Bow Tutorial

Stitch it in place and cut off the extra.

Velcro Bow Tutorial

Now it’s time to add in the main colour of the bow. Cut out the red pieces of felt like below. They need to be a couple of mm smaller than the black so it appears as if there’s a border.

Velcro Bow Tutorial

Stitch it together and you’re finished 😀

Velcro Bow Tutorial

Useful, cute and distracting from how sleep deprived you look first thing in the morning ;D Now that’s the trifecta!

Velcro Bow Tutorial

Blinged Diamante Decoden Lipstick Palette

Long time no post huh? Things have been a bit quiet here lately, it’s been one of those weeks where everything seems to be piling on >_< I’ve had the flu so feeling fairly un-energetic during a week that was very high paced for work. All of that means no energy left over for blogging which really sucks 🙁 I should be back up to posting every day next week again though and I’ve almost finished setting up my gallery and some other things which I’ve been planning for a long time so please look forward to that!

Back to it, one thing I did manage to do this week was deco my purse lip colour pack. I bought the container from Daiso several weeks ago and filled it up with lip colours that I use regularly.

Deco Lip Stick Holder

I was just going to post the deco part of this project but after receiving a question from the lovely Mrs Aunty Leroy about how to save lipsticks which have been trashedenjoyed by kids, I thought I’d add in the rest!Deco Lip Stick Holder

This is the container I bought from Daiso, it was $2.80 and has 12 spots as well as a mirror and a tiny useless brush.

Deco Lip Stick Holder

Using a sharp (sterilised) knife I cut off the end of each of my favorite lipsticks and smooshed them into place. It’s not particularly pretty but works like a charm XD

Deco Lip Stick Holder

Lastly I took a lighter to it and melted the tops so they all looked nicer. Obviously if you plan on doing this please be very careful of fire and plastic.

Deco Lip Stick Holder

After that it was just a matter of wiping any excess or overflow colour off.

Deco Lip Stick Holder

Now let’s talk about the deco!

Deco Lip Stick Holder

I’ve discovered the joy of backwards tweezers for deco 😀 😀 😀

Deco Lip Stick Holder

I’ve used regular tweezers before but if you’re working for more than an hour or so they can give serious hand crampage but reverse tweezers where they scissor shut automatically are genius! Still not as good as the Magic Pick but very awesome none the less.

Deco Lip Stick Holder

So first thing I did was decide on the design as per usual. This I wanted to be more plain and subtle. I have a lot of deco stuff in my handbag so it’s nice to keep some of it plain for variety. I picked a center piece (big metal diamante bow) and basically filled in the rest of the lid with rainbow finish acrylic gems my Mother found on sale at a junk store.

Deco Lip Stick Holder

First I glued the center piece in place with epoxy glue.

Deco Lip Stick Holder

Once it was dry I laid down a line of glue along the bottom edge and placed the first row of diamantes.

Deco Lip Stick Holder

I used the edge of my magic tray to make sure they dried completely level. Super important because if you screw up the foundation row the rest is very difficult to get straight!

Deco Lip Stick Holder

I continued around the outside until I had a complete border.

Deco Lip Stick Holder

Then it was just a matter of filling in the middle!

Deco Lip Stick Holder

I use 5min epoxy glue so I work in small sections that I can easily fill in that time. I put down one row of gems around the outside row and worked inside in rows.

Deco Lip Stick Holder

This is the first section finished…

Deco Lip Stick Holder

Rinse and repeat leaving space around the bow to fill in later.

Deco Lip Stick Holder

Once the rest was dry I filled in around the bow as closely as possible while following the pattern.

Deco Lip Stick Holder

And finished!

Deco Lip Stick Holder

And there you have it  ^_^ A good evening craft that only took as long as 1 episode of Buffy XD

Deco Lip Stick Holder

What do you guys think?  Hope you’re all having a good weekend!

How To Make Tissue Flowers

This is another one of those crafts that I think we all did as children at some point but when done in a more delicate way it can be used as a great hair accessory. Tissue flowers!

DSC_0065 Tissue Flowers Tutorial

What you need:

  • Several tissues
  • Piece of string/thread
  • Ink/food dye/watery paint
  • Paint brush

Tissue Flowers Tutorial

I’m using cute tissues that have designs stamped on them but you can use regular ones too, the only real requirement is that they be several ply each. Lay a stack or 2-3 tissues out on a table.

Tissue Flowers Tutorial

Fold the combined edges over around 1cm.

Tissue Flowers Tutorial

Continue folding back and forth so it forms an accordion shape.

Tissue Flowers Tutorial

When you reach the end you should have something like the photo below.

Tissue Flowers Tutorial

It can be hard to crease tissues so it’s a good idea to lay it down and run your hands along like this:

Tissue Flowers Tutorial

Find the middle by folding it in half…

Tissue Flowers Tutorial

And tie it tightly with the thread.

Tissue Flowers Tutorial

Now from here there are two main ways to continue…

I’ll show you the one on the right first!

Tissue Flowers Tutorial

It should be noted that when I took the photos for these I couldn’t get the colour to show up a reasonable amount so I have photoshopped it to have a lot more contrast and colour so you can really see what’s going on.

Next step is to separate the layers of tissue…

Tissue Flowers Tutorial

Separate as many of the ply as you can so it flares out like this…

Tissue Flowers Tutorial

Repeat on the other side…

Tissue Flowers Tutorial

Now either tear or cut the edges of everything so it looks more like petals. You can cut in different ways depending on the type of flower you like.

Tissue Flowers Tutorial

At the moment it looks like a bit ball of tissues…

Tissue Flowers Tutorial

Now mix up your ink/paint…

Tissue Flowers Tutorial

And very carefully touch the paint brush to the tips of the tissues…

Tissue Flowers Tutorial

Keep going and it will look something like this! Done!

Tissue Flowers Tutorial

Now version two which has lots more colour and looks more like a hibiscus!

Tissue Flowers Tutorial

Back to where you’ve just tied the string around the middle, tear or cut the ends of the pleat off to form petals.

Tissue Flowers Tutorial

Now paint the ends with the ink.

Tissue Flowers Tutorial

You can use a lot more than if you were painting one of the ply because it’s thick and won’t disintegrate.

Tissue Flowers Tutorial

You can also add a second colour to the middle section if you like.

Tissue Flowers Tutorial

Leave it to dry and then pull all of the ply apart. Scrunch the middle together and twist slightly.

Tissue Flowers Tutorial

You can shape the outer petals into 5 points to make it look more like a traditional flower. Scrunching the middle is the finishing touch!

Tissue Flowers Tutorial

Now you can add a hair pin or something like that and you’re finished!

This is one I did with some decorative napkins…

VioletLeBeauxDSC_0405_559

All fluffed up…

VioletLeBeauxDSC_0409_563

And stuck on a hair pin! This is a super easy thing to do if you’re in need of a quick hair accessory!

DSC_0065

Cute Lace Heart Jumper Sweater Customisation

A while ago Sandra wrote in to me asking how I would go about repairing a knitted jumper (sweater for those in the US) that had been stained in an accident in her Chemistry class. While I was cleaning out my wardrobe I noticed that a some of them were in need of repairs. With knitted items you pretty much have the following options for repairing stains:

  • Try to soak/bleach/wash it out if possible. (Tia says: Please remember if the sweater/jumper/cardigan is pure wool NOT to try bleach first. Bleach basically disintegrates wool.)
  • If you know how to knit/darn then you can carefully remove the section and repair with similar yarn.
  • Patch it over with something cute. I’ve seen sweaters like this with adorable little felt patches in various shapes all over.
  • Embroider something cute over it.

This was the result:

Jumper Modification Tutorial

The sweater below is one that I just wear around the house when it’s cold. It looks nice over a dress and is made of soft acrylic yarn so very low maintenance. But it’s quite plain… so to demonstrate one idea to cover a stain I decided to jazz it up a bit.

Jumper Modification Tutorial DSC_0062

What I used:

  • Old pair of socks that are too cute cute to throw out but I never actually wear.
  • Needle and thread
  • Lace
  • Matching ribbon

Jumper Modification Tutorial

I cut off the top part of the sock which had the cut pattern.

Jumper Modification Tutorial

I decided to use them to make pockets so I flattened the fabric out.

Jumper Modification Tutorial

Then cut the bottom into a heart shape.

Jumper Modification Tutorial

Using the needle and thread I gathered around 3cm of fabric at the top in the middle.

Jumper Modification Tutorial

After putting it together you ca see the heart shape forming ^_^

Jumper Modification Tutorial

I stitched around the raw edges to attach it to the jumper.

Jumper Modification Tutorial

Taadaa pocket 😀

Jumper Modification Tutorial

Repeated on the other side…

Jumper Modification Tutorial

To cover the raw edges I then added lace around the edges.

Jumper Modification Tutorial

And on both sides…

Jumper Modification Tutorial

I finished the picked with a small matching bow on one side.

Jumper Modification Tutorial

To add one more piece of interest I used some spotty ribbon and stitched it in a zigzag pattern up one side and ended it in a bow.

Jumper Modification Tutorial

Very very very simple ribbon embroidery ^_^

Jumper Modification Tutorial

And there we go! Finished in around 30 minutes and nice and cute ^_^

Jumper Modification Tutorial

This probably the easiest way possible to cover stains and I personally love the result!