by VioletLeBeaux | Apr 15, 2011 | Craft, Storage/Utility-Tutorials, Tutorial
The lovely Celeste asked that I try to come up with a cuter way to store paper towels in the kitchen. Our kitchen is tiny so previously we just kept the paper towel in our cupboard which was kind of annoying to get out every time we used it. I decided to take care of two birds with one stone and have it displayed as well.

![]()
|
What you need:
- Old knitting needle
- Suction hook
- Ribbon/yarn/pompom edging/something pretty to tie it up with
- Blue tac
- Pegs
For the string part I used old pom pom edging but you could use a pretty ribbon or anything you like as long as it goes with the colour scheme in your kitchen. |
Tie each end of the string to a peg.

Stick the knitting needle through the paper towel roll.

Clip a peg to either side…

Leaving a gap around 3cm from the edge of the paper towel wrap a piece of blue tack around the needle. This is to prevent the peg from getting to close to the towel and stopping it from spinning on the needle.

Put the suction hook up on the wall and hang in place…

I decided to tie the top up a little higher so it looked more interesting. You could also add a big bow or something pretty to cover up the hook depending on your style. So that’s the basic idea, now it’s all about customisation! If I customise mine any more I will definitely post about it 😀

Do you guys have cute kitchen things? I’m slowly adding to my kitchen collection but nice kitchen things can be quite expensive! Haha that’s just another excuse to craft more things myself though 😉

EDIT: As Sefie pointed out in the comments, you should never hang paper towel above gas burners in case they catch fire! I thought I had mentioned it but apparently I didn’t so completely my bad >_< The back two burners on our stove are actually broken and so are never used. There is also a fairly decent gap between the back of the burners and the splashback behind even though the angle of the photo makes it look like there isn’t much. My bad again and please do be careful where you hang this if you decide to make one!!
by VioletLeBeaux | Apr 8, 2011 | Craft, Storage/Utility-Tutorials, Tutorial
Project Make-My-Bedroom-Nicer is in full swing now and over last weekend I made my biggest project so far:
A chandelier!

I’ve wanted a chandelier since I was a little kid ^_^ The bedroom is taking a kind of romantic silver/gold/black damask theme to it so I figured that this would be the perfect accompaniment.
![]()
|
What you need:
- Clothes hanger thing
- Crystals (mine were old Christmas decorations on sale at borders)
- Damask wrapping paper or paper and pens to draw your own
- Hot glue
- Paint
- Chain
- Black yarn
- Fishing line or thin light thread
When we first moved in here I bought this clothes airer thing and it’s legs broke almost right away >_< I didn’t keep the receipt though so I was stuck with the damn thing. So I thought long and hard about what I could do with it and the only thing I thought of was chandelier! Let’s get to work ^_^ |

From the top you can see it has 8 arms and is the perfect shape for a project like this.

First thing to do is to remove all the pegs and plastic chains.

Next it’s time to paint it. I decided to aim for silver and black and I wanted the main colour to be silver. I didn’t have any paint spare so I used some nail polish the lovely BGDino sent me 😀

It took 2 coats to get it looking silvery which amounted to around 1/4 of the bottle. Totally worth it 😀

Make sure to let it dry completely between coats no matter what kind of paint you’re using. You might want to undercoat it for a perfect finish but I figure that it’s very high up so it’s not going to have much wear and tear and also no one is going to see it closely XD

Don’t forget the bottom too!

Now lay out the jewels you have. I used large clear ones and smaller pink ones as well as a couple of little star beads.

The large clear ones were old Christmas decorations I got on sale from Borders and already had fishing line threaded through to hang them with.

The pink ones I bought from a closing down bead shop so I threaded them with matching blue/silver cotton to hang them.

Each ring will have the same jewels hanging at the same lengths so make sure to cut the threads evenly.

Each arm has 4 threads of jewels hanging at different lengths. This is the order of jewels I used for each arm:

Hang the jewels from the hooks and you should start to see everything taking shape!

At this point I hung mine up from a clothes rack so I could work on it more easily. To hold it up I just hooked some of the chain through the top and looped it around the rack.

At this point I thought it needed something to make it more impressive.
So time for damask!

Cut out sections of damask which at tall like this, they are going to take the place of candles ^_^

Fold in half…

And cut out the insides!

Glue each of the “candles” to the ends of the arm parts.

To make a center piece I cut out 4 of these little butterfly shapes from the paper and glued them so there was damask on both sides of two pieces.

Then cut half the way down the top middle on one of them and half way up the bottom of the other and slot together!

From the top it should look like a cross like this:

Glue in some chain or matching ribbon in the middle for the whole thing to hang from.

This is how it looks hanging so far:

Now add in the center piece on a thread from the middle with a big jewel from the bottom.

Add drapes of chain to the first hanging points…

And drapes of yarn knotted at each loop around the outside…

Snip off any loose ends of the threads…

Hang that sucker up because you are done!

Now it’s probably not fit to hang in my imaginary multimillion dollar Swiss chalet but it sure cheers up my current bedroom ^_^

Once I can get some more supplies I’m planning to add more jewels and more dangly chains so it looks absolutely awesome. This is still a pretty good start though I think ^_^

Hard to photograph clear jewels and get in the epic sparkle of the silver but so pretty in person!

And so there you have it!

I hope you all enjoyed this tutorial as much as I enjoy watching the jewels spin around at night ^_^
by VioletLeBeaux | Apr 7, 2011 | Craft
Another mini craft, not even a tutorial but a way to save money ^_^ Sometimes outlet stores have sections up the back for damaged stock, the Forever New in the DFO at Southwarf has one of these full of broken jewellery and accessories. I LOVE them because it’s a huge gold mine for awesome stuff at tiny prices.
Last time I was there I picked up these little gloves for $1.95, originally priced at $14.95. Perfect condition but the seam at the thumb had unraveled a little.

![]()
|
Big hole but a tiny problem ^_^
Needle and thread to the rescue, 5 minutes of running stitch later and they are all finished!

Taadaa…

And here is the other pair of similar gloves I did the same thing with:

All ready for a day at the flower show 😀

Quick craft that saved a bunch of money ^_^
Tomorrow it’s make up tutorial time, hope you’re all looking forward to that! |
by VioletLeBeaux | Apr 6, 2011 | Craft, Hair-Accessory-Tutorials, Tutorial
Last winter berets with little pearls were everywhere in shops at crazy prices and now that it’s getting colder I’ve started seeing them in stores again. They are really cute but paying $30 for a pearl studded beret is out of my budget especially when you can get a plain one for like $6 and diy it ^_^

I had this pink one that I never really used anymore, I picked it up at a Portman’s clearance outlet a couple of years ago so I spent a few minutes jazzing it up.

![]()
|
What you need:
- Beret
- Plastic fake pearls
- Thread and needle
Before I started I laid all of the pearls out so I could get the correct spacing. I started from the outside and worked in. Once I get the pattern section of the blog up I will add in a diagram. |
With the beret laid flat I spaced out 10 pearls around the outside.

Then working in I added another row, spacing them between the first ones. It’s important to use plastic pearls on a project like this so it doesn’t weight the hat down. Also rather than stitching them on using one long thread sewn throughout the hat I tied each pearl on individually. This means that if one came loose the rest would be fine and also a lot less effort in the stitching/making sure the stretch of the knit was maintained.
This is what it looked like after the top was done:

Then it was time to turn over and do the other side…

I toyed with the idea of a row of pearls around the very edge but decided to keep it more subtle instead.

And here I am wearing it at a the Melbourne Flower show on the weekend!

I love projects like this that add a lot of small details to an outfit. Tiny little touches that just give something an extra level of depth make me very happy ^_^
by VioletLeBeaux | Apr 4, 2011 | Craft, Storage/Utility-Tutorials, Tutorial
Another one of these crafts that we all do as kids and seem to forget about… Cute egg cosies! Ok personally I think egg cosies are completely pointless other than for decoration in this day and age XD The point is to keep your soft boiled eggs warm until you are ready to eat them but I have never once sat down to eggs and thought “Damn! My egg is so luke warm, if only I had someway to keep it warm… other than eating it straight away”. Of course it could be that if I lived in a colder climate I would think these are the best thing ever invented XD
Either way, they are insanely cute and are actually useful if you plan on taking hardboiled egg in a lunch box as they add some padding to prevent cracks. I’m planning some patterns for knitted versions as well but in the mean time here is the way I’m pretty sure everyone made them as a child: felt!

What you need:
- Felt in various colours, as I’m making a bunny I went with white and pink for the nose
- Needle and thread
- Scissors
- Small piece of elastic.
- Egg (for measuring)
![]()
|
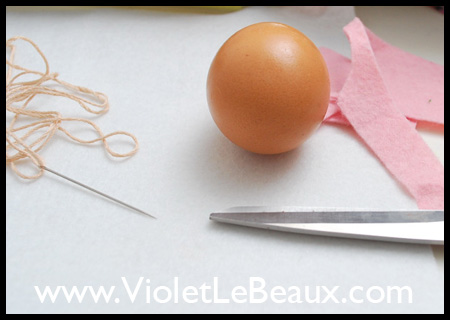 First thing is to measure around your egg to see how much felt you will need. Make sure to leave enough room so that it is easy to slide on and off the egg and still has room for the seam down the back. Also measure how tall you want it, It will need to be tall enough to cover the egg completely as leave room for the gathering at the bottom as well as the ears up the top. First thing is to measure around your egg to see how much felt you will need. Make sure to leave enough room so that it is easy to slide on and off the egg and still has room for the seam down the back. Also measure how tall you want it, It will need to be tall enough to cover the egg completely as leave room for the gathering at the bottom as well as the ears up the top.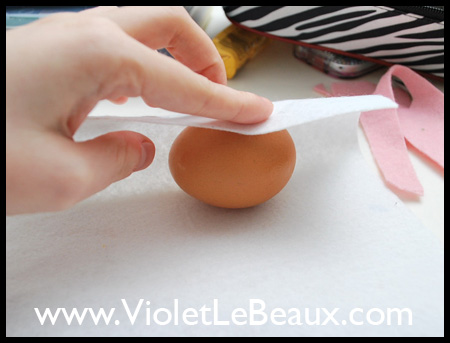 |
Once you’ve measured and cut the felt into the correct size rectangle, fold the sides inwards to the middle like so:
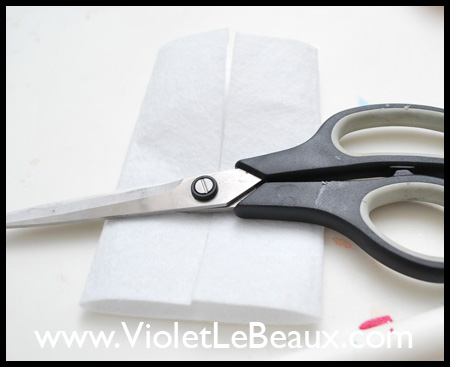
It’s a bit hard to see in this photo because of the colour of the back ground but the next step is to cut the shape of ears into the top. I started with 2 points and later cut them to be more rounded.
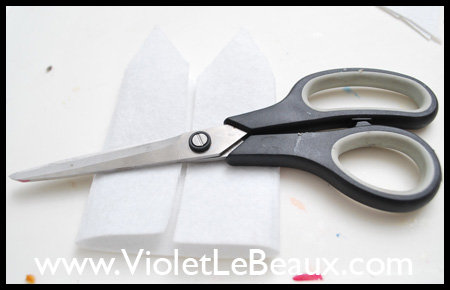
Once you unfold, you should have 4 ears up top.
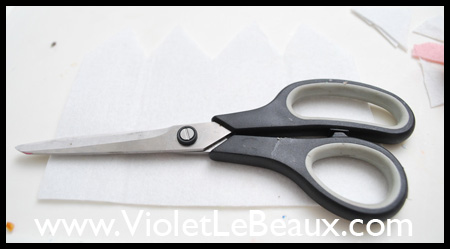
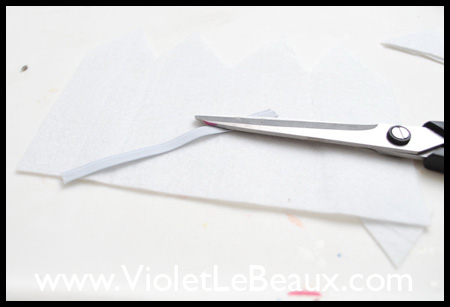
Now cut a piece of elastic which can stretch easily to fit around the widest point of the egg…
And stitch it to the bottom of the felt, leaving a small gap at the bottom for a frill. Make sure that the elastic is stretched out when you sew it and stitch loosely so you don’t restrict it otherwise you’ll find it hard to get the egg in!
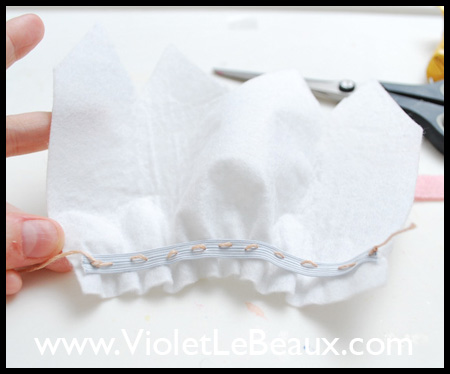
From the front it looks like this….
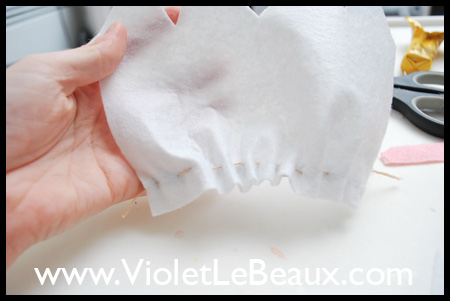
Now fold it all in half with the seam at one side…
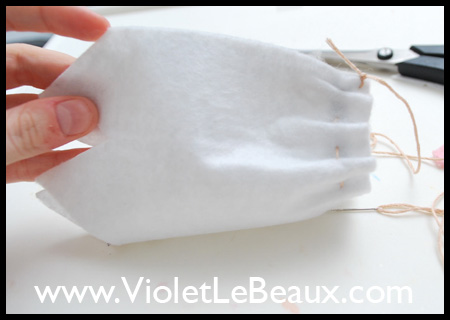
… and stitch up using a blanket stitch.
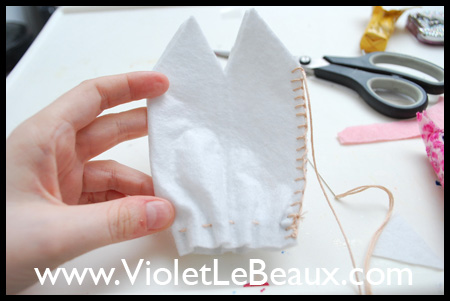
Once you flatten it out it should look something like the picture below. This was the point that I decided to round out my ears a bit.
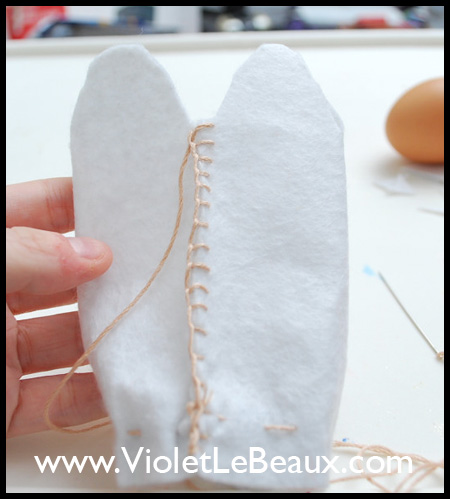
The next step is to stitch around the tops of the ears in the same blanket stitch.
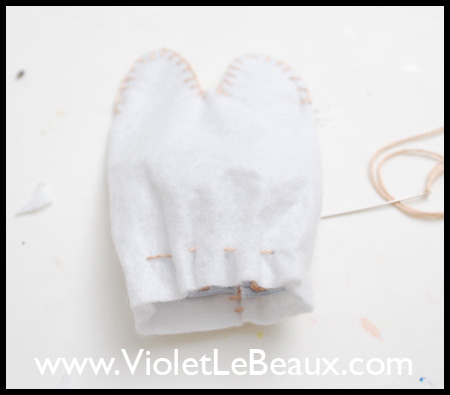
After that’s done it’s just a matter of cutting out a little nose…
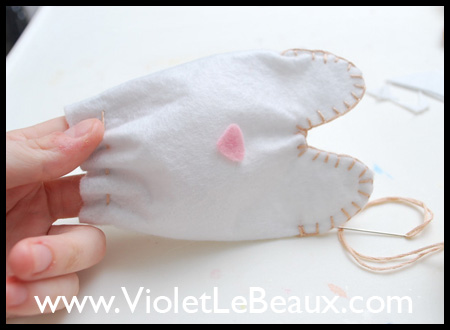
And stitching on it’s face!
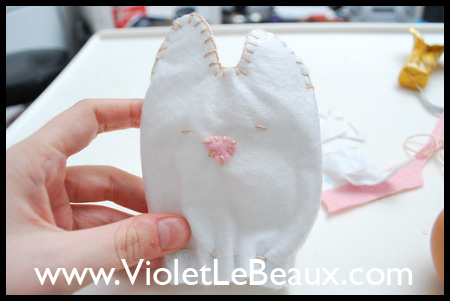
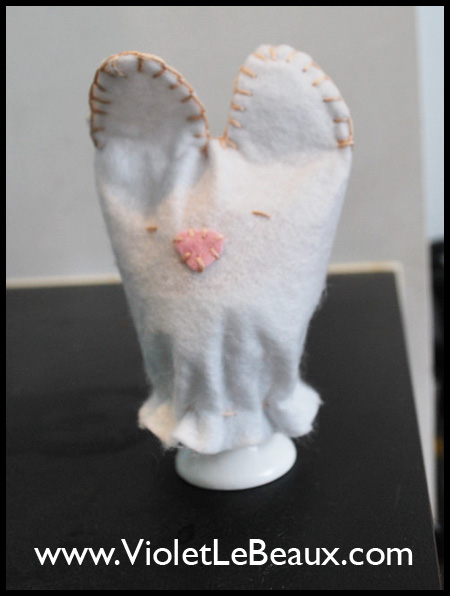
Pop and egg in and he’s finished! Ready to keep your egg toasty warm or safe in your lunch box.
The pattern itself is very easy to change into any shape you like because really it’s just a rectangle of felt XD These kinds of projects also make nice customisable quick presents for people that have everything especially because you can personalise it so much. Try stitching on their name of using their favorite animal ^_^
by VioletLeBeaux | Mar 28, 2011 | Beauty, Beauty-Tutorials, Craft, Hair-Accessory-Tutorials, Tutorial
Here is another super quick craft which can be done during an episode of something on tv 😀 These haven’t quite made it to Aus yet but when traveling I’ve seen how popular they are in Asia. Basically it’s a shape (usually a bow or something equally cute) with velcro on the back to hold your fringe out of the way while you do your make up/remove it. I think the idea is that it doesn’t kink/shape the hair like holding with a pin would.
I chose to make mine in the shape of Hello Kitty’s bow because… well I couldn’t think of any other shapes and I’m running out of other felt colours haha!

Photos are iphone quality unfortunately because this was a midnight craft idea!
![]() .
.
|
What you need:
- Felt
- Needle and thread
- Velcro strips

First cut out the main shape of the bow in black felt. I didn’t have any large pieces yet so I did it in sections and stitched them together. It’s a fairly easy shape but if anyone wants it let me know and I’ll put up a pattern.

Separate the two sides of your velcro. The side you want to use it the scratchy one not the soft one. The soft one won’t grab on to your hair.

Cut enough so you can cover as much of the bow as possible, I needed two strips.

Stitch it in place and cut off the extra.

Now it’s time to add in the main colour of the bow. Cut out the red pieces of felt like below. They need to be a couple of mm smaller than the black so it appears as if there’s a border.

Stitch it together and you’re finished 😀

Useful, cute and distracting from how sleep deprived you look first thing in the morning ;D Now that’s the trifecta!

|


 Wouldn’t it be awesome to have a list of all of my downloadable tutorials? OMG so convenient! I know right?