How To Make Snowflake Window Stickers

See the full post here for more information and a photo tutorial: https://violetlebeaux.com/2012/02/snowflake-window-sticker-tutorial/

Subscribe to my channel: http://bit.ly/pfjebH
Subscribe to my Vlog channel: http://bit.ly/xwQ9w3

Blog: http://bit.ly/qIKumk
Mobile blog: http://bit.ly/oF86Yz
Twitter: http://bit.ly/onCld1
Facebook: http://on.fb.me/pdZ8B5

Music: Garageband .
~~~~~~~~~~~~

Shop: http://bit.ly/NknExz
Blog: http://bit.ly/qIKumk
Tumblr: http://bit.ly/oF86Yz
Twitter: http://bit.ly/onCld1
Facebook: http://on.fb.me/pdZ8B5
Instagram: http://instagram.com/violetlebeaux

~~~~~~~~~~~~

A blog and Youtube channel about a girl and her quest to make everything sparkle. New craft, hair and beauty tutorials every week!

Violet LeBeaux spends most of her time trying to think of ways to make life prettier, posting said ways on her blog and drinking very strong tea. She writes about big hair cute things, girly fashion, beauty finds, sometimes Hime Gyaru fashion (姫ギャル) and crafty tutorials.

She lives with her adorable boyfriend Jimmy, fluffy puppy Miss Lottie and Bergamot Bunny in Melbourne, Australia.

~~~~~~~~~~~~

Music: Garageband unless otherwise credited
~~~~~~~~~~~~

How To Make Snowflake Window Stickers Instructions
Today I’m making snowflake window stickers!
Start by drawing your design on to a sheet of baking paper.
I’m doing a snow flake but you can do whatever shape you like.
Use puff paint to trace the design.
You can also buy proper window sticker paint but puff hair is cheaper and more accessible where I live.
Experiment with different sizes and thicknesses depending on the paint.
You may find that if your paint is too runny you won’t be able to do small details.
You can also cut the tip of the paint to create different shapes kind of like piping cream.
Leave it until it’s completely dry, mine took overnight.
Gently peel it off the paper when it’s completely dry.
Be gentle so you don’t damage any of the little parts.
Wet the back slightly and apply it to your window.
Done!
These are a great way to brighten up any room… so long as you have a window obviously.
Such a fun and easy project, next time I want to do a bunch of little stars to decorate my mirror with.
Check out the link in the description for a photo version of the tutorial on my blog.
I hope you enjoyed the video, good luck if you give it a try and thanks so much for watching!
Bye!

My Hair Post Dove Nourishing Oils- Dove Nutri-Oil Advertorial Part 3

This post was sponsored by Nuffnang and Dove.
For more information on sponsored posts please click here.

So last post on the Dove Nutri-Oil trial today!

The biggest thing I’m guessing you’re interested in is the results? So did I notice long term differences? Not a huge amount, my hair was in good condition at the beginning of the trial so I wasn’t expecting to see gigantic before/after results. But I imagine that had my hair been dry or in need of more repair I would have seen a more noticeable difference. I’m looking forward to seeing how the winners of the competition go with it and whether they have different results to me.

So you can judge for yourself, the photo from before we started:

dsc_5925-www.jimmyamerica.com-traveling philosophers

And more recently after using:

DSC_5816-wwwJimmyAmericacom

Like I said, short term results are good. I like that my hair is shiny when using it, I like that it’s easy to style and I like the my hair is very soft. Overall it feels very good after putting it in so I really enjoyed the short term results.Will I keep using it now the trial is over? Yes I will continue to use it but probably not as religiously. I think it’s a nice treatment to use after washing but I most likely won’t continue using it every single day before styling as I really don’t think my hair requires it that often. More likely I will use when I think my hair needs a boost or keep in my handbag for an emergency shine boost.

Using the Dove Nutri-Oil system has definitely given me a different perspective on oil hair products, I have been happy with the results and it’s reasonably priced so there’s no reason I wouldn’t continue along with it.

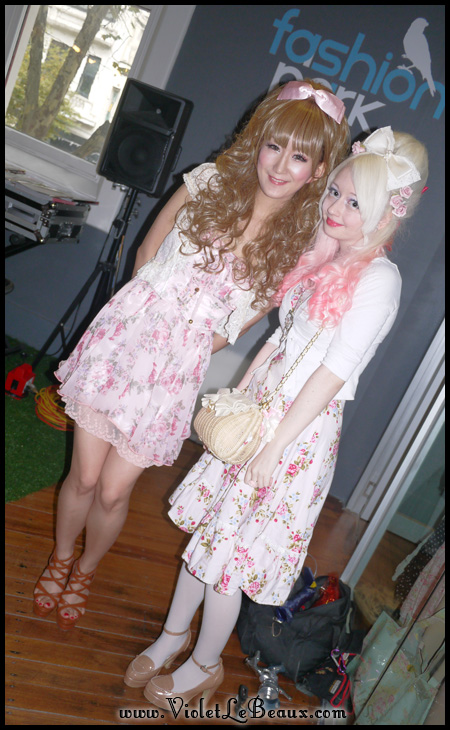
Easy styling, with my adorable friend Julia at Fashion Park:

VioletLeBeauxP1040997_15500

Lastly, here’s a shot from the LMFF show I did last week so you can see the current state of my hair and judge for yourself!

And a more recent one from last weekend while I was trying on glasses at an accessory store 😀

So did any of you guys try out the Nutri-Oil range yet?? I’d love to see if you had different results to me!


How To Make DIY Faux Fur Boot Cover

I posted this photo a little while ago on my mobile blog and a couple of people asked for a tutorial so here it is ^_^

VioletLeBeaux-Boot-Cover-DIY-Tutorial-_4550_16385

A few weeks ago I was asked to model in the Asia Pacific L’Oreal Melbourne Fashion Festival for local store Glamaz. They stock a lot of my favorite brands like Lizlisa etc so I said HELL YES :DAnyway the look called for white fur shoes to match the coat but they didn’t have any in stock in my size at the time so I figured it was a good chance just to make some myself.You need:

  • Base shoes with a decent heel and an ankle strap. I’ll do another version for non-ankle strap shoes later.
  • Faux fur
  • Material for the inside, I used polar fleece
  • Sewing machine or needle and thread (sewing fake fur by hand is VERY tedious though)
  • Ribbons (optional)
VioletLeBeaux-Boot-Cover-DIY-Tutorial-14_15770
So these are my shoes. I love them a very inappropriate amount so there was no way I was going to do anything permanent to them.

VioletLeBeaux-Boot-Cover-DIY-Tutorial-12_15768

So before I start just a quick tip on sewing faux fur: make sure the hairs and pointing away from the stitching as much as you can before you sew otherwise it will get caught in the stitching and be very annoying to get undone later. Also if you’re going to cut, separate the pile down the cut line before you snip so you get minimum hair all over the place.

VioletLeBeaux-Boot-Cover-DIY-Tutorial-18_15774

Right, so we need to measure how long the faux fur needs to be. Wrap it around one of the shoes and use that as a length measurement. Remember to include a seam allowance and it’s always better to cut too much than too little.

VioletLeBeaux-Boot-Cover-DIY-Tutorial-16_15772

So this is the height and width I ended up with. Make sure it’s tall enough to cover the top of the shoe easily as well as hide your toes.

VioletLeBeaux-Boot-Cover-DIY-Tutorial-19_15775

I made sure to leave plenty extra on the top and sides for seams.

VioletLeBeaux-Boot-Cover-DIY-Tutorial-21_15777

Cut out a matching piece of polar fleece but make it around 5cm shorter in the height measurement. This is because we really don’t want it sticking out on the wrong side.

VioletLeBeaux-Boot-Cover-DIY-Tutorial-20_15776

Place the polar fleece on the furry side of the faux fur and stitch down both long sides so it makes a tube.

VioletLeBeaux-Boot-Cover-DIY-Tutorial-22_15778

You should have something like this, see that there’s more fur than polar fleece when it’s laid flat.

VioletLeBeaux-Boot-Cover-DIY-Tutorial-23_15779

Turn it inside out and you can see how it’s supposed to sit better.

VioletLeBeaux-Boot-Cover-DIY-Tutorial-25_15781

And wrapped around the shoe you can see it coming together.

VioletLeBeaux-Boot-Cover-DIY-Tutorial-27_15783

Measure how big it needs to be to get around the shoe and then stitch the ends of the tube together. I started at the end of the polar fleece, went around to the fur then finished up at the bottom of the polar fleece again. You can’t do the whole thing on the machine because it needs to turn slightly inside out to finish up so you will need to leave a gap at the end, it’s easier to hand stitch polar fleece so leave it there.

VioletLeBeaux-Boot-Cover-DIY-Tutorial-28_15784

Afterwards you should have this:

VioletLeBeaux-Boot-Cover-DIY-Tutorial-30_15786

Hand stitch up the gap and make one  for the other shoe too.

VioletLeBeaux-Boot-Cover-DIY-Tutorial-29_15785

Now to hold them onto the shoe you have a couple of options:

  • Slide them on and hope they don’t fall down during the day. Not recommended.
  • Add two ribbon loops that you can slide the ankle strap of the shoe through so it stays in place all day. Recommended.
  • Rush out the door because you are running late for your own fashion show and cut a couple of holes in the polar fleece so you can slide the ankle strap of the shoe through it. It’ll hold for now until you can do something a bit better and more permanent like the ribbon option later.
So guess which I chose.

VioletLeBeaux-Boot-Cover-DIY-Tutorial-31_15787

Anyway, ribbon is obviously the best option, just stitch a couple of little pieces on the inside that line up with the ankle straps on the shoes and you’re good to go.

Pop the cuff on the shoe and you’re finished! Really much easier than it actually sounds XD

VioletLeBeaux-Boot-Cover-DIY-Tutorial-_4549_16384

I added a pin bow off one of my dresses to each side and that’s how the crisis was averted 😀

VioletLeBeaux-Boot-Cover-DIY-Tutorial-_4548_16383

And for bonus points, here’s a photo of me wearing them during the practice run 😀

-Boot-Cover-DIY-Tutorial-7gSZcZ-8

I really like them and now I’m thinking of buying a couple of other colours of fur so I can have different cuffs for different shoes. What do you guys think?

By continuing to use the site, you agree to the use of cookies. more information

The cookie settings on this website are set to "allow cookies" to give you the best browsing experience possible. If you continue to use this website without changing your cookie settings or you click "Accept" below then you are consenting to this.

Close