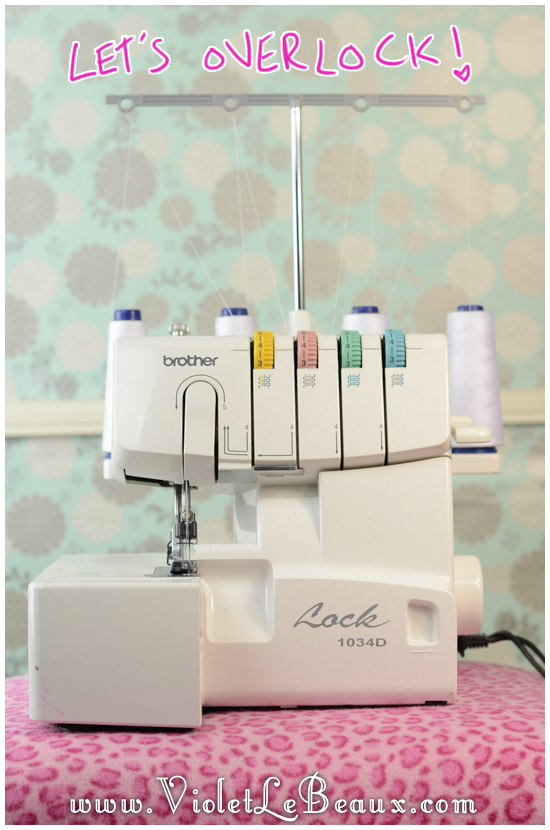
About Overlockers and Sergers! Sew Fun!

Ok back into sewing this week and I think it’s time to learn about the other machine that some of your may or may not have: the overlocker (or serger if you’re in the USA).

About-Your-Overlocker-61

So what is an overlocker?

Basically it’s a big fat sewing machine which uses 3-4 threads and seals the raw edges of fabric. It usually has  a little blade arm which cuts the edge of the fabric as you stitch along it so it makes a really neat perfect edge.

The purpose is to seal edges so they don’t fray but also overlocked seams are neater and more sturdy because they have 2 lines of basic stitching and 4 threads rather than the 2 of a regular machine.

The basic line of stitching that an overlocker creates is 2 regular lines of straight stitch with two other threads which zigzag between them and around front to back. Most of the time overlocking is hidden inside the garment but occasionally you can use an overlocker to create very tight visible stitches on unfolded hems. This is usually done of fabrics like chiffon where hems are a pain in the butt but also for visual effect on others.

Have a look at the inside of one of your dresses, you’ll see thicker seams which are overlocked.

So do you need one?

If you’re planning on selling the clothes you make or want a really professional finish then I think it’s a great tool. It’s not 100% necessary but they are really good to have and I find them to save a lot of time. If you are wanting to save time you can always overlock fabric pieces together rather than edging each and then sewing together. Not technically “correct” in sewing theory but it saves a lot of time and effort!

Overlockers are also more expensive, require more maintenance because they have a lot more moving parts and mechanics. They are harder to thread and generally harder to wrap your head around. That said if you put in the initial effort they are totally worth it.

My machine cost around $600 in 2005, it was a birthday gift, it’s a “Lock 1034D” and I haven’t had it serviced it the 8 years I’ve had it (out of cost and laziness). It’s broken a few times since I’ve owned it but each time either James or I have been able to just take it apart and find the issue. Can’t complain!

About-Your-Overlocker-45


I’m not really going to go into detail with the mechanics of threading an overlocker because each one is dramatically different but here is how mine works:

About-Your-Overlocker-45b

Two of the threads are threaded through the two needles like you would a regular machine and then the other two are threaded inside the actual machine and come out under the foot.

Close up it looks something like this:

About-Your-Overlocker-61

From the top it looks quite complicated but basically you have 4 spools of thread and then holder clips and tension wheels for each.

About-Your-Overlocker-64

On the side there is a handwheel, foot lift, air vent and power button.

About-Your-Overlocker-65

And then on the other side there are levers to control the stitches and the cutter.

About-Your-Overlocker-69

You machine will probably have completely different levers.

About-Your-Overlocker-70

Overlockers usually have a front panel which slides down to reveal the mechanics.

About-Your-Overlocker-77

The two underneath threads are threaded through a series of metal loops and little metal pull out pieces which push into place and thread the inside.

About-Your-Overlocker-77a

Most modern overlockers actually have instructions colour coded on them so you can just follow the numbers to thread it. Be extremely careful when you are threading not to have your foot on the pedal. There are so many moving parts in there which could easily catch fingers!

About-Your-Overlocker-80

About-Your-Overlocker-77b


So really the most important thing to do if you’re considering an overlocker is try them out in store to find one you like the feel of and make sure it comes with really thorough instructions. Most places that sell sewing machine offer free classes so you can get to know your new machine, they are definitely worth checking out if you have the time. My overlocker came with a VHS (which was completely outdated even then) instruction video and in this day and age a lot of companies have specific beginners videos on getting started.

My top tips for working with your machine when you get it:

  • Practice threading… a lot in the beginning, it will save you time later when a thread snaps and you’re half way through an outfit. 
  • Overlockers go a lot faster than sewing machines.
  • Make sure you clean out the insides often. Bits of thread, dust and other crap gets inside the machine easily and it can clog up the mechanic causing more expensive damage. Clean it out regularly to avoid that!
  • Practice on a lot of scrap fabric because the cutting blade can be a bit hard to handle.
  • Practice doing curved edges too, it can be difficult to get the hang of because you have to consider where the blade is.
  • Don’t be put off by how complicated it looks, once you have played around for a while it’s so much fun!

Hope this was a useful post and let me know if you have any questions and I’ll do my best to answer them next time!

Casual Back Hair Bow Video Tutorial

I realised I forgot to post last week’s video tutorial as well as this week’s *_* I don’t know where my brain is these last few weeks. I will be replying all of your comments and emails asap! And there will be a new Sew Fun this week all about Overlockers/Sergers.

Today’s tutorial is another bow hairstyle. Bows never get old!

Here is a tutorial for a big bow: http://www.youtube.com/watch?v=klHXSvfr-fk
And here’s a tutorial for a mini bow: http://www.youtube.com/watch?v=811Rz69FSYM

And two photos tutorials of the mini and big bow hairstyle tutorials:
https://www.violetlebeaux.com/2013/01/how-to-do-a-mini-bow-hairstyle-photo-tutorial/

https://www.violetlebeaux.com/2009/07/bow-hairstyle-tutorial-for-medium-length-hair/

One of my projects recently has been transcribing all of my videos to make closed captions and so they can be very easily translated. If you would like to be involved in the translation process and you speak another language send me an email!

Anyway what this means is that I will be posting text instructions with the videos as well so you should be able to follow along. Eventually all of these videos will have photo tutorials to match but for now here is the first transcript!Casual Back Bow Hairstyle Instructions!
Hello Besties!
Today we’re doing yet another bow hairstyle.
This one is really casual and is on the back in a half up/half down style.
Let’s get started!
This style looks really great if your hair is already curled.
Brush your hair backwards and start with your fingers at your ears.
Pull them upwards so you are grabbing a section on either side of your head.
Make sure that you leave the middle bit because we’ll be poking through there in a minute.
Tie the sections with a hairband but on the last loop don’t pull all the way through.
Make sure that the ends of the hair are pointing down and there’s a loop above the tail.
Just like this.
Separate the tails into halves and push them to either side.
Now separate the loop into halves and push them to the sides too.
Grab a little bit of hair from underneath the band.
And pull it upwards over the top of the loops.
This is going to form the middle part of out bow.
To pull it through and hide the band, what you need to do is poke a hold beneath the hairband.
You can use your fingers but I used a teasing comb.
Just to make enough room to pull that piece of hair that we are using through it.
You can either continue wrapping the hair around to hide the band more or just let it hang loose.
That depends on if you want to hide the band or if you are planning on covering it later with an accessory like a bow or a flower.
Now puff up the loops on the side so that they look more bow like and give the whole thing a blast of hairspray.
Pin anything in place that’s sticking out weirdly.
I was aiming for a casual version of this style so I left it a bit messy.
You can also do a sleek, elegant version by using a bit more hairspray and smoothing down all the fly aways.
What you should have is a nice bow at the top with some cute curly ribbons hanging down below.
Tadaa! Totally cute.
All done!
The perfect cute but casual hairstyle!
I’ve done a lot of other bow tutorials for mini and huge bows, so make sure you check those out too.
I hope this was a useful video.
If you enjoyed it make sure to like, comment, favourite, subscribe or whatever you want to do!
And thanks so much for watching!
Bye!

By continuing to use the site, you agree to the use of cookies. more information

The cookie settings on this website are set to "allow cookies" to give you the best browsing experience possible. If you continue to use this website without changing your cookie settings or you click "Accept" below then you are consenting to this.

Close