KMS Shampoo, Dry Shine Styler, Travel Kit Review

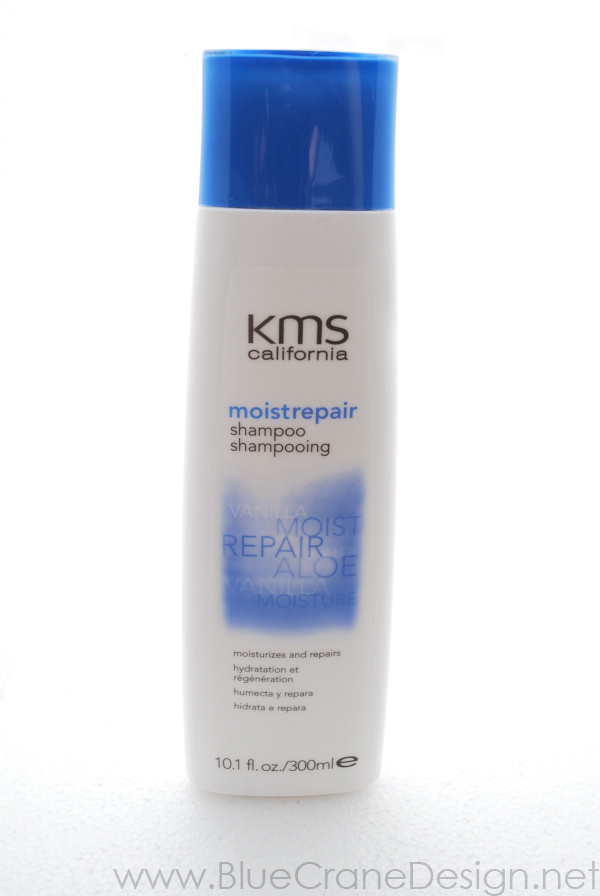
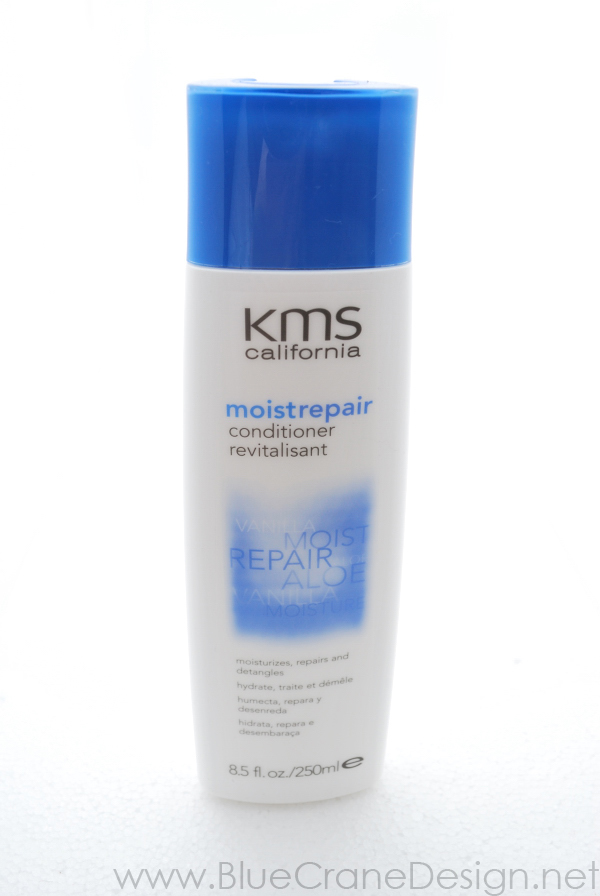
Before MBBE I had never heard of KMS California but I’m very glad that they included their shampoo and conditioner set in the gift bags because I found something to add to my must-have list.

Out of all the shampoo/conditioner sets that were in those bags, I found the KMS ones to be the most compatible with my hair. If you want to see what it beat out you can see the other items in the gallery here.

Brand: KMS CAlifornia

Name: Moistrepair Shampoo and Conditioner

Price: I googled for Australian prices and the average seems to be around AU$20 per bottle

If you follow me on Twitter you would have seen me asking for recommendations for hair treatments and products to fix my damaged hair. I’ve been dying my hair various colours for almost 10 years now and while I’ve escaped most damage it does take it’s toll.

The bleached sections of my hair are relatively unscathed but the pink dye is drying out the ends like crazy. If you have any recommendations for non-damaging-not-ridiculously-expensive pink dye available in Aus I would love to hear them! So yes trying to be kinder to my hair so I can keep the pink happening as long as possible. I’ve tried quite a few different hair treatments and with the exception of one which I will review later, these two products have by far improved the texture of my hair the most.

After using consistently for 1 month I can really feel the difference in the ends especially. Less straw and more silk if you know what I mean XD

The texture to both products was quite thick. The shampoo feels substantial and while lathering easily it doesn’t produce so many bubbles that your entire head is engulfed. The conditioner feels soft and silky but not so slippery that it runs off the hair, it grips well to the hair if that actually makes sense. There’s no strong smell which is also a plus in my books.

The only major con I have for these (other than the intensely ugly/generic looking bottles) is the price. At $20 for 1 bottle you really need to be prepared to invest in it. For me personally I don’t have the budget to do that unless I can find them on sale somewhere.

MBBE3873907092287499408MBBE7613581391061228344

VERDICT: Overall while it’s certainly not on the cheap side, I think this is the best shampoo/conditioner combination I’ve ever used for my particular hair. So if I had the money to make the choice I wouldn’t hesitate to buy them repeatedly. DO WANT.The PR agency for KMS also sent me their Dry Shine Styler as well as the travel kit to test out after I mentioned I have problems with frizz.Name: Dry Shine Styler

Price: $19.95

Basically it is supposed to shine and smooth down all of your little fly away hairs. I’m sure there is all kind of fancy technology employed to do that but that sort of thing you can read about on their website.

DSC_0022

It comes in the form of a glue stick XD The idea is that you can take it anywhere and use it on the go. You are supposed to smooth it straight onto your hair, I found that doing that was too much product and too hard to see what I was doing so instead I applied to my hand and then wiped it onto the hair.

It seems like an odd thing glue-sticking your hair but I remember at school when girls I knew used *actual* glue sticks to do this if they were desperate hahaha!

DSC_0024

So does it work? You be the judge…

Before. Unbrushed hair first thing in the morning:

VioletLeBeauxDSC_0433_1330

After. Applied very lightly on hands and smoothed down, no brushing:

VioletLeBeauxDSC_0435_1332

So yes it does work, and it works very well. You would think it would be heavy and oily to get such a dramatic result but it’s really not. My hair didn’t feel greasy and I couldn’t notice much of a difference at all. There is a light plesent scent with it, kind of smells like a hair salon actually XD

I think the biggest fan of this product surprisingly enough was actually James. As a photographer he is forever having to photoshop out fly away hairs from client work, after one use with me he wanted to take mine to use on shoots. I didn’t want to give it up though so now we argue over who can take it on certain days XD I feel almost like we need a lawyer approved joint custody arrangement!!

VERDICT: Love it. Again pricey but you need so little of it to get results that I imagine it would last for a *very* long time and therefore be worth the investment. James says it’s a must for photographers and I would agree that I can tell when I’ve used it/not used it in outfit photos! DO WANT.

Now small bonus with these reviews, from May 1st if you buy any 2 KMS products you get this cute little travel bag as well as a change to win a $1000 travel voucher. Clearly they know how I think because it’s got my travel motto stamped on it:

“I didn’t come all this way not to look good”

VioletLeBeauxDSC_0423_1320

Inside it’s got a bunch of little bottles, sprays and jars to put your travel beauty products. Clear case so you can take it on the plane with you and a pocket inside to hold make up. They even were nice enough to print my name and address onto the label for me XD

VioletLeBeauxDSC_0427_1324

So summary? I am very glad that KMS put those first products into the MBBE gift bags because if they hadn’t I probably wouldn’t have been introduced to some of my current favorite products.Very much looking forward to trying and testing more from them in the future. Thumbs up from me.

How To Style a Hime Gyaru Wig

As carrying on from yesterdays post on Fashion Addict here is how I styled the blonde one into a hime gyaru wig 😀

The technique I’m using is pretty much the exact same technique for standard hime style hair but because it’s a wig there’s no fear of damage so you can pretty much go nuts. Or if you are happy to brush out lots of tangles this is a perfectly fine way to style your actual hair.

VioletLeBeauxDSC_0189_755

As per usual with these I point out that this is just the way I do it and there are lots of other techniques or methods that you could use. I’m certainly not an expert!

So this is the wig to start with, it’s just a plain old multi-tone blonde wig. The cut is layered and it has a light wave to it. As you can see it has very little volume.

VioletLeBeauxDSC_0132_698

The way the top of the hair is parted is also important, this one has a zigzag pattern. It would be better if it was a straight part of even no part so it’s less obvious when you brush it all backwards.VioletLeBeauxDSC_0136_702So what we want to do is create a lot of volume at the top and sides to make the big lion’s mane effect. The first step is to grab a section in the middle/top and pull it up. I am using a teasing comb to do this, it’s awesome because it has alternating long and short bristles so it catches all of the short hairs and teases perfectly… which it should being a teasing comb and all.

Back to it, grab a section at the top towards the back of your head. Leave around 2cm of hair between the section you’re taking and where you want the fringe/bangs to start. At the moment we just want to create a lot of volume before we use the front to cover it all up.

VioletLeBeauxDSC_0138_704

Pull forward and tease the back of the section around 3-4 inches from the root. By teasing/backcombing what I’m doing here is combing from the middle back down to the roots. The teasing brush catches all of the shorter hairs and meshes them together into a tangle which gives the piece of hair volume and texture.

VioletLeBeauxDSC_0140_706

Once you’ve teased it a reasonable amount it should have volume all on it’s own, you will of course look like an extra out of a Dr Seuss book at this point.

VioletLeBeauxDSC_0144_710

So that’s the volume part but the front looks terrible so to fix that we need to smooth down the front. Take your comb and using light short strokes brush lightly back over the front section. You may need to hold the wig in place while you do this. Don’t let the bristles of the comb sink into the hair too deeply or you will basically be undo-ing all of the teasing you just did.

VioletLeBeauxDSC_0147_713

Once you have smoothed the front over it should look something like this from the side…

VioletLeBeauxDSC_0149_715

That’s really all there is too it, just a lot of teasing, smoothing and eventually hair spraying. This wig is perfect for styling like this because it has lots of short layers. Clip the section you just styled out of the way, we will come back to it later.

The next step is to give the wig more volume all over so it start to get into the right basic shape: lion’s mane XD

Starting with small sections from the sides, hold the piece of hair out at a 90 degree angle and tease the 3 inches closest to the root.

VioletLeBeauxDSC_0151_717

Repeat this until you’ve done every piece of hair on each side. Don’t touch the front area between the first section we did or the fringe.

VioletLeBeauxDSC_0152_718

Now keep going to the back. Pull the sections upwards and tease at the roots. You can see in this photo the individual tracks of hair and my pink tips showing through XD

VioletLeBeauxDSC_0157_723

Don’t forget to do the underneath sections too, they are very important because they hold the rest of the style up!

VioletLeBeauxDSC_0160_726

Below you can see how much volume is created just by teasing at the roots. Because this wig is more wavy than actually curly I decided to play up the curls by teasing them at the ends slightly too. To do this, you grab the end of a curl by the tip and run the comb from the tip up a couple of inches. Only do this once per curl otherwise you disturb them rather than accentuating them. Basically you’re pushing the curl up the strand of hair so it looks… curlier.

VioletLeBeauxDSC_0161_727

Now it’s time to finish the top section finally! Unclip it and we’ll get to work 😀

VioletLeBeauxDSC_0164_730

At this point it should look something like this…

VioletLeBeauxDSC_0168_734

The final step involves the sections between the top and fringe that we’ve been saving. Taking a small piece of hair from that area at a time, tease the back of it lightly and then sweep it backwards.

VioletLeBeauxDSC_0171_737

At this point hairspray will be your friend. I’m taking a lot of spray. You can see below I’ve started sweeping the front back on the left side but not the right yet.So it’s starting to come together.

VioletLeBeauxDSC_0175_741

Because you are trying to brush pieces of the wig in directions they weren’t designed to go in, doing this will take some trial and error. Getting mine to stay took a whole lot of hairspray and then a lot of teasing and smoothing over the front…. tease, smooth, spray, tease, smooth,spray over and over.

This is starting to look more like the finished product now but not there yet.

VioletLeBeauxDSC_0166_732

Half finished from the back it looks very messy so this area needs to be combed and sprayed as well.

VioletLeBeauxDSC_0169_735

After continuing with the combing and spraying, paying careful attentions to the sides as well as the top this was my finished product:

VioletLeBeauxDSC_0177_743

From the side:

VioletLeBeauxDSC_0184_750

Now looking at the photos I can see areas I intend to improve, for example cutting more layers into the back and using that to creating more defined curls.

You can see below  that it definitely needs a few more layers to make the top pouf look more natural with the loose hair below. Until I do that (or if you don’t trust yourself cutting into a wig) this can be temporarily hidden with a big bow.

From the back:

VioletLeBeauxDSC_0182_748

With the addition of some accessories I’m quite happy with the way it turned out considering it was a first attempt. When I make the changes I’m planning I will be sure to post photos of that too 🙂

VioletLeBeauxDSC_0189_755

Bonus photo: Taking off the wig and scaring the hell out of James with by real hair because he was so used to the wig XD

VioletLeBeauxDSC_0199_765

The wig by itself from the front:

VioletLeBeauxDSC_0204_770

The back:

VioletLeBeauxDSC_0202_768

Side:

VioletLeBeauxDSC_0203_769

So there you go, that was my first adventure into wig styling and I’m quite happy with the outcome. Of course there are a lot of areas that I need to improve in and this isn’t the best example of a hime style wig but I can see where I want to go from here  and that’s all for another post! I think to style the back and sides I will make James wear it so I can see what I’m doing better hahaha!

VioletLeBeauxDSC_0186_752

Hope you enjoyed my bout of Hime Gyaru wig styling ^_^

How To Make A Hello Kitty Velcro Hair Holder

Here is another super quick craft which can be done during an episode of something on tv 😀 These haven’t quite made it to Aus yet but when traveling I’ve seen how popular they are in Asia. Basically it’s a shape (usually a bow or something equally cute) with velcro on the back to hold your fringe out of the way while you do your make up/remove it. I think the idea is that it doesn’t kink/shape the hair like holding with a pin would.

I chose to make mine in the shape of Hello Kitty’s bow because… well I couldn’t think of any other shapes and I’m running out of other felt colours haha!

Velcro Bow Tutorial

Photos are iphone quality unfortunately because this was a midnight craft idea!

.

What you need:

  • Felt
  • Needle and thread
  • Velcro strips

Velcro Bow Tutorial

First cut out the main shape of the bow in black felt. I didn’t have any large pieces yet so I did it in sections and stitched them together. It’s a fairly easy shape but if anyone wants it let me know and I’ll put up a pattern.

Velcro Bow Tutorial

Separate the two sides of your velcro. The side you want to use it the scratchy one not the soft one. The soft one won’t grab on to your hair.

Velcro Bow Tutorial

Cut enough so you can cover as much of the bow as possible, I needed two strips.

Velcro Bow Tutorial

Stitch it in place and cut off the extra.

Velcro Bow Tutorial

Now it’s time to add in the main colour of the bow. Cut out the red pieces of felt like below. They need to be a couple of mm smaller than the black so it appears as if there’s a border.

Velcro Bow Tutorial

Stitch it together and you’re finished 😀

Velcro Bow Tutorial

Useful, cute and distracting from how sleep deprived you look first thing in the morning ;D Now that’s the trifecta!

Velcro Bow Tutorial

Naïve Beauty Eye Mask – Review

A while ago Naïve Beauty sent me some eye masks to review, I’ve been using one every few days for the last month so it’s time to share the results 😀

They come in a box of 10 pairs and retail for AU$36. You can get further information from their website here.

Each pair is wrapped in plastic and foil with information and instructions on the back.

Eye Mask Review

Inside there are two squishy jelly pads in a small amount of liquid that are placed under your eyes. I found that the packets were really hard to open without spilling the liquid everywhere, probably because I’m weak but I had to get James to open them because I couldn’t do it with my nails XDThe smell is quite nice and subtle and having them on feels very cool temperature-wise. The instructions were easy to follow and comprehensive.

Eye Mask Review

This is what they look like out of the packet, the texture is very slippery and jelly-ish also they were quite cold.

Eye Mask Review

This provides quite a problem as they don’t like staying on the face!! The website suggests that there’s “no need to lie down” and suggests you apply them while doing any number of things such as cooking dinner, watching tv or in the car. I couldn’t even get them to stay on while sitting still so I would be surprised if they lasted through cooking dinner… I think someone might end up with a not so nice surprise in their lasagne XD

Eye Mask Review

Seriously… there are like 30 outtake photos of me doing this trying to get them to stay on for the photo.

Eye Mask Review

But I got one!! So you’re supposed to leave them on for around half an hour, I managed to keep mine on that long by laying down and watching tv. They feel silky and cool while on and if they were easier to keep on I think they would be really awesome.

Eye Mask Review

Afterwards the feeling is very nice. My eyes did seem less puffy after use but long term I didn’t notice much difference in my skin. I think they felt very nice and the short term results were good but long term they are nice but not a miracle cure for bags.

VERDICT: Very nice feeling afterwards, more of a luxury than a necessity. Between the slipperiness and the packet making a mess they could be a lot easier to use. The price works out to $3.60 per pair so that’s about average for eye treatments/individual face masks here in Aus. DO WANT.

Macaron Chocolate Dipped Nail Art Tutorial Video

This tutorial has been waiting for a very long time XD I first did this design when we moved here to Melbourne to celebrate going to a chocolate party and it was a big hit then so I’ve done it several times since! As you can see I went a little crazy with the nail art tutorials while I had long natural nails hahaha.

Hope that was helpful and let me know if any of you try it 😀

By continuing to use the site, you agree to the use of cookies. more information

The cookie settings on this website are set to "allow cookies" to give you the best browsing experience possible. If you continue to use this website without changing your cookie settings or you click "Accept" below then you are consenting to this.

Close