Another sewing tutorial 😀
This time I’m making some nice comfortable room wear to lounge around at home in ^_^ I spend a lot of time at home working and I like to be nice and comfy while I’m doing it so cute house clothing is the key!
The set I’m showing you how to make is a very basic loose shirt and tight pants. You reeeeally can’t get much more basic than this. The fabric I’m using is a stretchy soft towelling so it breathes well in summer and is nice and soft for relaxing. It is also nice and stretchy so it’s forgiving if you make a mistake or you’re a beginner.
It was quite hard to take photos for this one as I didn’t have a big enough space to spread the fabric out completely, I’ll be as descriptive as I can but let me know if it doesn’t make sense!
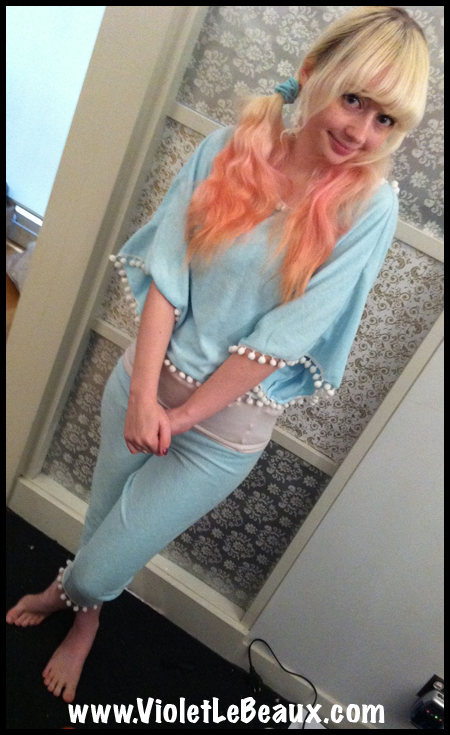
This is the result, not the prettiest but damn comfortable!
|
What you need:
We will make the tunic/shirt part first, it’s super easy! You need two rectangles of fabric, the longer side should be as long as you want the shirt to be from the end of one sleeve to the other and the short side as long as you want to be from shoulder to bottom hem. |
Place the two rectangles of fabric on top of each other then fold them in half from right to left.

Now we will cut a neck hole along the fold that we just made. Because it’s a simple tunic you can create the neck hole by snipping of a decent chunk of the corner like this:

When it’s unfolded it looks like this:

Using your overlocker or sewing machine stitch along the top seam from the end of the sleeve to the the beginning of the neck hole.
Now you need to decide how big you want the tunic to be around your waist/bust. The easiest way to do this is to try it on and pin in place!

Leaving a seam allowance cut along the line you pinned and then down again to the sleeve. You should be cutting out a big triangle chunk like this:

Repeat on the other side!

Now stitch all of the seams together and also overlock all the loose seams. You should have something like this, big loose and comfy!

Decoration time 😀 I added a row of this pom pom edging I had left over from another project around all of the seams ^_^

Taadaa!

Now it’s time to work on the matching pants! I wanted mine to be 3/4 length so I cut 4 pieces in that length then cut out a big “J” shape for the crotch area. Always cut your pieces bigger than you think you’ll need, it’s easy to take things in if they’re too big but if they’re too small you’re screwed!

Again the easiest way to get the right size is to try it all on and pin it so it fits. First off I made the pants loose and straight with no tapering to the ankle. I stitched the seams down the sides and down the inside of the leg.

Then I stitched the crotch together so it formed pants 😀

After trying them on I decided to make them more fitted around the bottom of the legs so they were more like yoga pants or leggings so I pinned and re-did the seam up the inside of the leg.

After I was happy with the fit I had this…

Again it’s fairly important to do simple pants like this out of fabric with a stretch to it otherwise you won’t be able to get them over your hips! Now you also need a way to keep them up so they don’t fall down unexpectedly XD
I achieved this by stitching elastic into the waistband. After that was done, time to decorate again 😀

Again I added pom poms edging to the waist and ends of the legs!

Taadaa pants!

Now put them together and you’ve got a nice set!

And there you have it! Cute and comfortable room wear made in about an hour.
Perfect for chilling out on the couch or writing important business emails… just remember not to offer to video conference call while wearing them XD
This is the kind of post that will eventually have an accompanying pattern. Let me know if you want it and I’ll move it up on the list of to-do’s 🙂


