Quite a while ago I was sent a bunch of 1000 hour individual eyelashes to test out:
To be honest I wasn’t really thrilled about the idea of individual lashes, it sounded like an awful lot of unnecessary effort to me. I mean who really wants to apply full eyelid’s worth lash by lash? Who has time for that either? It wasn’t until I did a bit of a rethink and took some inspiration from the lovely SuperKawaiiMama that I got some inspiration.
These lashes are perfect for a cute casual look. You don’t actually need to put lashes over the whole eye to get an adorable effect, these are perfect for a cat-flick at the side! Ok so here is how to do it ^_^ These are my lashes to start with, I’ve applied some mascara and given them a little bit of a curl.
Before: cute and casual look.
This is the packet they come it, it’s a step up from 90% of other lashes available in Australia because the little tray they come in actually has a lid. I hate when you get lashes and they just come in the tray, it makes them useless for storage! This however is good and you get a lot of them in a pack so they last a while especially if you reuse them.
So to begin with get one of the little bunches.
And some scissors.
And cut the tip of the bunch on an angle. You need to do 2 of these (one for each eye so cut them in opposite directions). This is the part that will gradiat to the longest lashes on the ends. If you don’t have one of these it will look like you’ve just one a random flick on the edge.
This is what they should look like.
Now grab your lash glue. I would not recommend this brand unless you are allergic to others like me.
Add a tiny bit of glue to the base of the bunch. Depending on the glue you’re using you will probably need to wait for it to get tacky before applying.
Ok now apply it to you lash line, you should apply it a couple of mm before the end of your lashes. Once you apply the bunch, give it a little pinch to make sure it’s in line with your natural lashes.
Here is a photo of it applied to my lashes, you can barely see it because the shape blends into the length of my natural lashes. In the next photo I’ve highlighted where it it.
This is where it is placed, if you compare the below and above photos you’ll be able to see exactly what I mean and the angle of the cut.
This is how it looks when my eyes are open, it’s much easier to see here but you can still see how it blends.
And here it’s highlighted…
Ok! Now you want to get 2 more bunches per eye. These ones should be full sized. Do them one at a time so you have lots of control over the placement. Add the glue!
And this time we’re going to place this bunch next to the one we just did on the outside side (closer to the corner of the eye). You should make sure that the last one sits on the very edge of your lash line. By the time you’re finished you should have 3 bunches on each eye (2 full ones and 1 angled one).
Once you’ve placed them if you want you can add another coat of mascara to make all the lashes the same thickness or even curl them again. One other tip I have is that if you find they are sticking up at a different angle than your natural lashes, give them a coat of mascara and pinch them together with your natural lashes gently. The mascara will act like a light glue!
So this is what you should end up with:
And here is where the lashes are:
With eyes closed you can really see the difference:
And highlighted!
So there you go! This look is great as an everyday look because it’s not too heavy but the flick at the end is super cute. Now as for a review of the actual lashes I found them to be really good. I was really surprised at how durable they were, I’ve used the same 6 for this look several times. The best thing that I found was that they were comfortable enough to sleep in… probably not something I need to worry about every day but great when you’re on a 7hr plane trip! I was worried that because they weren’t held on by much glue that they would be hard to keep on but I haven’t lost one so far. You can get them from Priceline, Kmart and other beauty supply stores for around AU$7.95 which is an average price for lashes here in Aus. I really like them and I’ll be buying them again… though with this many in a tray I probably won’t need to for a long time hahaha! Have you ever tried the 1000 hour individual eyelashes?
Why aren’t there more options for headband storage?
If you are anything like me you have a billion alice bands/head bands/what ever you call a bow on a rigid frame that goes on your head… and as adorable as they look they are really annoying to store!
They get tangled and if you just throw them in a drawer it’s hard to see which is which! So here is my solution, I’m going to make a gigantic roll shaped like a cute piece of candy to hold them all 😀
This is what it’s going to look like at the end:
So first thing’s first, get all the materials. I’m doing a no-sewing version because my machine is packed up but if you replace the glue gun with sewing it will work just as well.
What you need to make my version of headband storage:
-Fabric -Foam for the inside (I am just going to recycle an old yoga mat but you can buy proper foam) -Ribbon or wool -Lace and flowers to decorate -Glue gun or sewing machine
Now if you’re doing a no-sew version like me you’ll need tape too. You can double your tape as a stylish accessory 😛
Ok let’s get started! Lay out your yoga mat (ignore these steps if you’re using foam for the middle) and start rolling.
You should make sure that the size you’ve rolled will actually fit the headbands so test one out to be safe ^_^
Once you get the right size it’s time to tape it in place.
Now you should measure and cut the fabric out. You need a large rectangle which is long enough to wrap around the mat and wide enough so that it hangs off the end like the wrapper of a piece of candy. Make sure to leave a few inches extra for hems etc.
You should be able to mock it up like this:
Now after you’ve cut out your fabric it’s time to decorate the ends on the candy piece. I like frilly things so I used some frilly cotton lace.
Use your hot glue gun to fix it in place. If you want you can hem the edges but because they are going to be covered with lace (and I don’t have my sewing machine out) it doesn’t really matter.
Taadaa lacy edged 🙂
Ok now let’s make it up. Lay the mat on the fabric, make sure it’s straight and tape it in place.
Roll that baby up!
Fold the ends over and glue/sew it in place.
Now you should grab the end with your hand…
…and give it a good twist. Just like making a real candy ^_^
Grab the wool/ribbon and tie it in place.
This is what you should have now.
It kind of looks like candy but I think it needs a nice candy stripe 😀 So grab some eyelet lace and glue it to the wool/ribbon.
Roll it around in a nice spiral and glue it to the other end ^_^
I hid the ugly ends by gluing a cute flower over the top, of course that’s optional.
So this is it!
Now you just need to add all your headbands and you’re done 😀
Tadaa! Candy head band holder 😀 What do you think? Nice and easy to store and they are all displayed nicely.
How do you guys store your headbands? Am I nuts for needing something this big? XD The sad part is that this one is full now and I think I need another one >_< Let me know your headband storage ideas!
Ok so this technically isn’t an ACEO but I just finished it so too bad you can all look at it XD
This one started as a joke between the hilarious Nixxy (if you love nail polish you should totally check out her blog!) and I. At the time I had just been told I might have Lupus so I decided that if someone asked me what Lupus was I would just tell them I was a werewolf 😀 This led to a discussion about a Hime style werewolf terrorizing the town in search of brand and diamantes!
I probably should have spent a bit more time on this, I’m not 100% happy with how it turned out. I think it needs a lot more details and fine tuning. It really was quite a quick sketch… I’ve just been to lazy/busy to finish it!
So if you wake in the dead of night and the moon is full, listen closely you might hear the lone hime wolf’s cry of… “Jesuuuuuuuus Diiiimaaaaaaaaaaanteeeeeeeeeee! WOOOOOOOOOOOOO!”
Well as promised here is my outfit for the Nuffnang awards in all of it’s minute details!
I put so much time and effort into this outfit that I think it deserves it’s own post if only for my records heeheee!
The dress:
I was so torn on what dress design to go with. I wanted something Hime Gyaru obviously but I wanted it to also feel like I was wearing a million dollars rather than something I’d made. Originally I wanted to buy a dress but I couldn’t find anything I liked so I improvised.
This is how it all started out:
I cut one of my basic patterns out of a stretch cream satin for lining.
Then I added the pink flower silk chiffon over the top in the pattern I wanted. I had no end of trouble with the chiffon, I wanted to throw it out the window so many times!
I feel the need to tell you all that I hand pleated the ribbon for the straps (and back up shoes). That’s right hand pleated. No where that could ship fast enough/was within driving distance sold pre-pleated ribbon! WTF?? I really wanted it though so I stubbornly decided to do it myself.
This is the neckline of the dress (yes blacked out the cleavage for protection of your eyes :P) The flowers are all hand sewn on and made of paper, in the middle is a giant heart shaped pink jewel which I just LOVE. The bust has a slight sweetheart line with a row of gathering to make it interesting.
There is also a 3 layer tiered petticoat which I made for this dress specifically. It’s out of cute dot tulle similar to my wrap. I wanted it to have a slight bell shape but nothing as extreme as Lolita so I kept it to 3 soft layers.
The whole outfit
I think this is one of the only photos of me without the wrap. I don’t normally show my shoulders or cleavage so I was a touch uncomfortable without it ^_^ James is taking a photo of my nails.
I made my wrap from some lovely dot tulle (different from the petticoat) which was edged with white pom pom fringing. The pom pom fringing was a super large pain to get as well! I swear that all the fabric shops in Brisbane keep a list of things that I desperately want and all collude with each other to not stock them…
The bag
This is how my bag started out. I got it on sale at Charlie Brown for around $20
I hated the ugly gold chain on the straps so I removed that and added a rose to make it match the rest of the outfit. It’s made of the softest faux leather I think I’ve ever touched.
The alternate shoes:
I found 2 pairs of shoes on sale at Wittner. This first pair was my back up pair, it took me forever to decide whether to wear these ones or the others because these were more comfortable but they didn’t go with the dress well while the others were stunning but were half a size too small *_*
Anyway these were $40 marked down from around $170. Before decoration…
After decoration… Notice the pleated ribbon again 😉
Detail shot: Yep I’m so detailed obsessed that I glued diamantes to the buckles ^_^
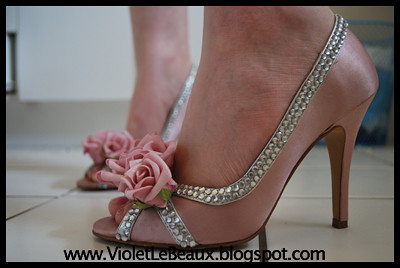
The real shoes
Now this is how the shoes I actually wore started out… On sale for $30 originally like $150ish.
After the Violet treatment…
They are so pretty but holy bajeebus are they painful! Seriously I think I hobbled around for half the night but it was totally worth it XD
Detail shot:
Interestingly enough these shoes tested by deco abilities. I couldn’t use plain old epoxy glue because it was too brittle, every time I put on the shoes a bunch of jewels cracked off. So I came up with the solution of glueing with epoxy first and then doing 3 top coats of plain old craft tacky glue. This gave it the flexibility to move with my feet 😀 Totally interesting right?
The nails
I didn’t get too many detail shots of my nails because I completely forgot about them ^_^ The are a pink base with a touch of glitter, white lace with ceramic flowers in pink and white on the very tips. The white lace even has little roses on it!
Funny story- I ran out of nail glue so I had to rush and get some for the flowers. They didn’t have my usual brand so I just grabbed one marked “Professional”. Turns out what they meant by “proffessional” was actually “rubbish and doesn’t stick to anything”. This lead to all kind of shenanigans with little roses flying off and having to dig around under heavy cabinets to get them back before the night. Lesson: Once you find a good nail glue stick with it!
Thought I’d show you my other nails for the trip while I’m here 🙂 These are blue and blue glitter stripes with silver tips and blue/silver diamantes.
Some of the small diamantes are heart shaped.
The jewelery
My choker, brooch and one of my bracelets were all custom made by the beautiful Celeste from Little Waltz. I commissioned Celestewith a jumble of ideas even before I had a dress and she made the most beautiful pieces for me!
This was the package that arrived from Little Waltz. Everything was packed super well.
The choker is pink pearls with a silver crown backing and a large flower over the top. There is a little chain with more pearls hanging down. The brooch has Swarofsky crystals dangling down in a vintage metal base and a beautiful pink cameo. She also included 2 absolutely beautiful bracelets with diamantes and little bells which jingle whenever I move. When I wear them I feel like a fairy!
I would absolutely recommend Little Waltzfor anyone needing custom or off the shelf jewelery, the designs are wonderful and the craftsmanship is just beautiful. Celeste handled all my panicky emails wonderfully and couldn’t have been easier to work with! The craftsmanship on the jewelery is immaculate and the prices were really reasonable, I’d give it all a 10/10!
The face
I decided to keep my make up fairly simple for the night with some false lashes and a hint of pink eye shadow. Lip gloss was of course a must too! 1000 Hoursent me some lashes to test out so I decided it was the perfect night to take one of the sets for a test run.
This was the set I was wearing, “Wild Damsel” you can buy them at Priceline for RRP $8.95. I used a different glue because of my allergy.
Of course here are some shots of them in action…
I found the application of these to be very easy, they held their shape quite well so it wasn’t a pain to reuse them next time. They were very easy to clean with warm water and with the help of my heated curler they were the perfect shape. I think if you wanted them more or less curled it would be quite easy to achieve. 1000 Hour sent me a couple of other products so I’ll be reviewing them soon for you all too!
Shot to see the length…
Well that’s a wrap everyone! I’ll be back to blogging as normal now that most of the move is out of the way 😀
Hope to see you all at the next Nuffnang Awards next year!
So remember when I said that I’d have a surprise when I reached 100 followers? Well today I reached 109! How exciting! My surprise is I’m going to start video blogging 😀
Because I’m still working on some real videos I thought I’d share with you a video of the fun Candice aka Super Kawaii Mama had while we were over in Singapore. This is why I was holding back the photos of us over the weekend. It’s so funny when you meet someone for the first time and feel like you’ve known them for years, I couldn’t have asked for better traveling buddies ^_^
So enjoy and let me know what you want to see in my future videos 😉
Thanks for watching and I hope you enjoyed the silly princess video!
Hey everyone, I’ve recovered a little bit now so I wanted to show you what I got up to on the night of the Nuffnang Asia Pacific Blog Awards!
I’m going to do another post tomorrow with all of the other days, this is just about the awards night it’s self. I had the time of my life and it was so wonderful meeting everyone in person!
So on to what you’ve all been waiting for…
That night we gave ourselves 2 hours to get ready. I didn’t want to rush at all I just wanted to chill out and enjoy myself.
Everything went really smoothly. My theme for the night was flowers and the jewelery that Celeste from Little Waltz made for me suited everything beautifully! I’m going to do a blow by blow of the whole outfit in another post because other than the jewelery I made everything myself!
After I was ready Candice aka Super Kawaii Mama who we had been hanging out with all day invited us to her room so we could arrive together.
All ready to go! This was my outfit run down for the Asia Pacific Blog Awards:
Dress- Hand made
Petticoat- Hand made
Wrap- Hand made
Jewelery- Little Waltz
Eyelashes- 1000Hour Lashes
Hair accessories- Hand made
Shoes- Witner but decorated by me
Bag- from DFO but decorated by me hahaha!
Nails- surprise! Decorated by me!
Candice, her husband Craig and I put the last touches on our outfits before heading downstairs. They looked so elegant!
Downstairs we met up with Erica from Girl With a Satchel, who was the other blogger from Brisbane. We traveled together and she is just too lovely!
While we were taking photos in the lobby of the hotel, everyone started taking our photos too! I felt like a celebrity!
There was literally a wall of other bloggers snapping us!
We traveled by bus to the event and around half way there Craig (who was sitting behind me) tapped me on the shoulder and pointed outside to the car full of kids who were waving and cheering at me! XD So cute!
When we arrived we were greeted with an explosion of camera flashes! We all walked the red carpet to the official photographer and got some shots done.
Aussie bloggers for the win!
Here I am posing with the program. It was a lovely souvenir! The entertainment for the night was Alan Woo (a Singaporean tv celebrity), JC Sum and Magic Babe Ning and the band Electro. I felt bad for Alan Woo, he was doing his best to keep everyone on track but with a room full of bloggers everyone kind of does their own thing!
We shared our table with the adorable Valerie from Dweam and her friends. Here we are making silly Mickey Mouse faces with the ears she borrowed from one of the fashion bloggers!
Valerie and her friends (who’s names I couldn’t hear over the loud music sorry!)
James chilling with some water looking suave 😉
Reading about the nominees…
Our view of the stage.
Each person got a little jar of hard candy which actually have Nuffnang’s initials/logo in the candy! They were really yummy!
It was funny how many people wanted my photo, I didn’t realize so many people actually read my blog! I felt so much like a celebrity, I think I took photos with everyone there!!!
James’ Pringles video CAME SECOND!!!! They picked the two best ones and played them both on the big screen! He was so excited! Here he is with the winner Jayden (who’s video was super professional). James was so happy to meet him!
This is to give you an idea of the number of people there… it was a massive event! We didn’t realize how big blogging was in Asia *_*
Of course Grace and I had to start taking stupid photos, Audrey couldn’t help looking adorable in them 😛
The food that night was delicious, it was absolutely 5 star!
The desert was my favorite, it was some kind of chocolatey cheese cake (maybe?) which tasted like Bueno… Perfect! And it gave me the perfect chance to show off my cute new eyelashes courtesy of 1000Hour Lashes 😉
After all of that excitement I was pretty tired so I settled into bed to wake up early for the tour day in the morning.
I had such a wonderful night, I really can’t thank Nuffnang enough. This was an opportunity of a lifetime and I couldn’t be happier. Look out for me next year on the nominee’s list 😉
I hope everyone else has fun at the Asia Pacific Blog Awards too!
Illustrator. Strong tea, knitting, watercolours, and making a video game called Moonlight in Garland. Living with her adorable husband Jimmy, fluffy puppy Miss Lottie and Bergamot Bunny in Melbourne, Australia.
By continuing to use the site, you agree to the use of cookies. more information
The cookie settings on this website are set to "allow cookies" to give you the best browsing experience possible. If you continue to use this website without changing your cookie settings or you click "Accept" below then you are consenting to this.